Picture a shared office building with a room full of filing cabinets. Every tenant stores their customer records, financial documents, and private notes in those cabinets. Now imagine that none of the drawers have locks. Any tenant can open any drawer and read, copy, or shred anyone else's files. That is what your Supabase database looks like without Row Level Security enabled.
This is not a hypothetical scenario. In June 2025, CVE-2025-48757 revealed that Lovable, a vibe coding platform with over 8 million users, had been generating Supabase databases without RLS. More than 170 production applications were confirmed exposed. Anyone with a browser's developer tools could copy the public API key from the client-side JavaScript and read, modify, or delete any row in any table. The filing cabinets were wide open.
If you are building with Supabase, whether through Lovable, Bolt, Cursor, or any AI coding tool, RLS is the single most important security configuration you need to get right. This guide walks you through exactly how to do it.
Why Supabase Is Different From Other Databases
Most traditional databases sit behind a server. Your application code connects to the database, and users never interact with the database directly. The server acts as a gatekeeper, deciding what data to return based on who is asking.
Supabase works differently. It is built on PostgreSQL but exposes your database directly to the client through a REST API. When your React app calls supabase.from('todos').select('*'), that request goes straight from the browser to the database. There is no server in between filtering the results.
This architecture is what makes Supabase fast and easy to use. It is also what makes RLS non-negotiable. Without a server acting as gatekeeper, the database itself must enforce access control. That is what Row Level Security does. It turns each filing cabinet drawer into a locked drawer that only opens for its owner.
Every Supabase project ships with a public API key that is meant to be embedded in client-side code. This key is not a secret. Anyone can see it. The only thing standing between that public key and full database access is RLS. If RLS is disabled, that public key grants unrestricted access to every row in every unprotected table.
How to Enable RLS on Every Table
Enabling RLS is a two-step process. First you turn it on, then you create policies that define who can do what. Skipping either step creates problems.
If you enable RLS without creating any policies, PostgreSQL's default behavior denies all access. Your application will appear broken because every query returns empty results. If you create policies without enabling RLS, the policies are ignored entirely. Both steps matter.
Here is how to enable RLS on a table called user_profiles:
ALTER TABLE user_profiles ENABLE ROW LEVEL SECURITY;
That single line changes the behavior of the table fundamentally. Before this line, any query with the public API key returns all rows. After this line, no query returns any rows until you define policies that grant access.
Now go to your Supabase dashboard. Click on "Table Editor" in the sidebar. For every table you see, check the RLS badge. If any table shows "RLS disabled," run the ALTER TABLE command above with that table's name. Do this for every table in your project. Not just the ones that store sensitive data. All of them.
Enabling RLS without creating policies locks everyone out, including your own application. Always create at least one SELECT policy for authenticated users immediately after enabling RLS. The correct order is: enable RLS, create policies, then test. If your app goes blank after enabling RLS, you are missing policies, not experiencing a bug.
The Four Policy Patterns You Actually Need
RLS policies map to the four database operations: SELECT (read), INSERT (create), UPDATE (modify), and DELETE (remove). For most vibe-coded applications, you need one policy per operation, and they all follow the same logic: "the authenticated user can only touch rows where the user_id column matches their own ID."
Users Can Only Read Their Own Rows
CREATE POLICY "Users read own rows"
  ON user_profiles
  FOR SELECT
  USING (auth.uid() = user_id);
The USING clause is a filter. Every time a SELECT query runs, PostgreSQL appends this condition to the query automatically. If a user's ID is abc-123, the database behaves as if every query includes WHERE user_id = 'abc-123'. The user never sees anyone else's data, even if they try.
Users Can Only Insert Their Own Rows
CREATE POLICY "Users insert own rows"
  ON user_profiles
  FOR INSERT
  WITH CHECK (auth.uid() = user_id);
The WITH CHECK clause validates data being written. It ensures a user cannot create a row with someone else's user_id. Without this policy, a malicious user could insert rows pretending to be another user.
Users Can Only Update Their Own Rows
CREATE POLICY "Users update own rows"
  ON user_profiles
  FOR UPDATE
  USING (auth.uid() = user_id)
  WITH CHECK (auth.uid() = user_id);
UPDATE policies need both clauses. The USING clause restricts which existing rows the user can target. The WITH CHECK clause ensures the updated data still belongs to the user. Without both, a user could change the user_id on their own row to hijack someone else's identity.
Users Can Only Delete Their Own Rows
CREATE POLICY "Users delete own rows"
  ON user_profiles
  FOR DELETE
  USING (auth.uid() = user_id);
Same logic as SELECT. The USING clause limits which rows the DELETE operation can affect.
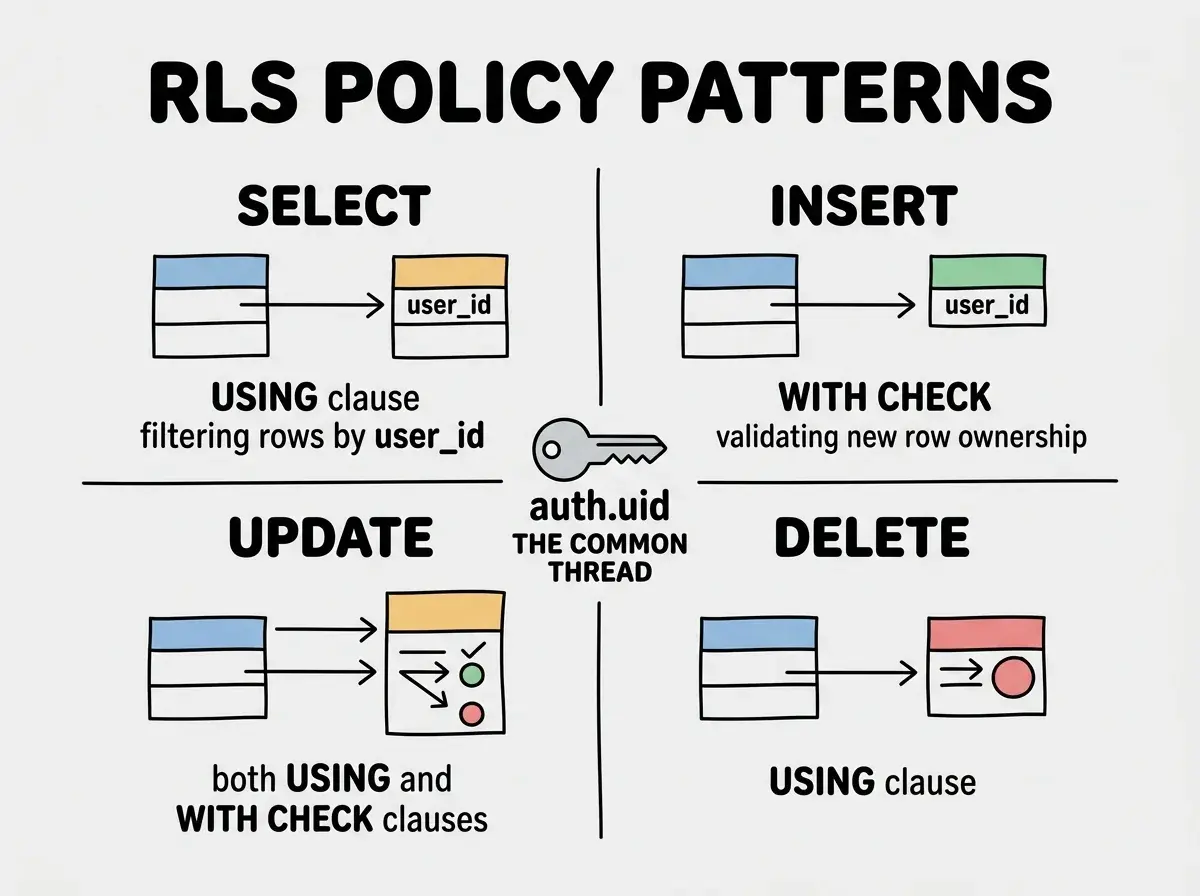
Apply these four policies to every table that stores user-specific data. If you have a todos table, a notes table, and a user_settings table, each one gets all four policies. The SQL is identical except for the table name.
Testing Your RLS Policies
Configuring RLS without testing it is like installing a lock and never checking if the key works. Supabase gives you a built-in way to test.
Open the SQL Editor in your Supabase dashboard. You can simulate queries as different users using the set_config function:
-- Simulate being a specific user
SELECT set_config('request.jwt.claims', '{"sub": "user-id-123"}', true);

-- Now run a query and see what comes back
SELECT * FROM user_profiles;
If your policies are correct, this query only returns rows where user_id matches user-id-123. Change the user ID and run the query again. You should see different results.
For a more thorough test, create two test users in Supabase Authentication. Sign in as User A through your application and create some data. Then sign in as User B and verify that User A's data is invisible. This is the filing cabinet test: can one tenant open another tenant's drawer?
You should also test the anonymous case. Sign out completely and try to query the database. With proper RLS, anonymous users should see nothing unless you have explicitly created a policy for anonymous access (which most apps should not).
Why AI Tools Skip RLS
If Row Level Security is this important, why do AI coding tools skip it? The answer is the same pattern that shows up across every security vulnerability in AI-generated code: the tools optimize for "make it run," not "make it safe."
When you ask an AI to build a todo app with Supabase, it generates tables, queries, and a working UI. The AI tests success by whether the app displays todos. RLS does not affect whether the app displays todos during development, because the developer is the only user. Everything works perfectly with one user. The vulnerability only appears when a second user exists, which never happens during AI-assisted development.
RLS also adds complexity that AI tools actively avoid. Defining policies requires understanding authentication flows, UUID matching, and PostgreSQL syntax. If the AI adds RLS and the policies are wrong, the app breaks with confusing "no rows returned" errors. From the AI's perspective, skipping RLS means fewer error states and a higher chance of generating code that works on the first try.
This is the fundamental tension. Security adds friction. AI tools are rewarded for removing friction. The result is code that runs beautifully and is wide open to exploitation.
Back to the filing cabinet analogy: the AI built you a gorgeous office with perfectly organized cabinets. It just skipped the locks because locks sometimes jam, and the AI wanted to guarantee the drawers would open smoothly every time.
RLS is one layer of defense. Learn the full security picture for vibe coders.
Explore the blogCommon Mistakes That Break RLS
Even when builders enable RLS, several mistakes can undermine it.
Using the service role key in client-side code. Supabase gives you two keys: a public anon key and a private service_role key. The service role key bypasses RLS entirely. If your AI tool puts the service role key in your frontend code, RLS is meaningless. The service role key should only exist in server-side code and environment variables, never in anything that reaches the browser.
Forgetting tables. You enable RLS on user_profiles but forget about user_settings, notifications, or audit_logs. Every table without RLS is an open drawer. There is no partial security here. One unprotected table can expose enough data to compromise your entire application.
Overly permissive policies. A policy like USING (true) grants access to all rows for all users. This is equivalent to not having RLS at all. AI tools sometimes generate this pattern when they cannot figure out the correct policy logic. If you see USING (true) on any table with user data, replace it with a proper user_id check.
Missing the user_id column. RLS policies need something to match against. If your table does not have a user_id column (or equivalent foreign key to auth.users), you cannot write a meaningful policy. Every table that stores user-specific data must include a column linking each row to the user who owns it.
Using the Supabase service role key in client-side code. The service role key bypasses RLS entirely, making all your carefully written policies meaningless. This key should only exist in server-side environment variables, never in frontend code. AI tools frequently place it in browser-accessible configuration files.
Check your Supabase project settings right now and verify that only the anon key appears in any client-side code.
Open your dashboard and verify RLS is enabled on every table before reading another word.
Read the security survival guideA Complete Setup From Scratch
Here is what a properly secured Supabase table looks like, from creation to policies. Use this as a template for every table in your project.
-- 1. Create the table with a user_id column
CREATE TABLE notes (
  id UUID PRIMARY KEY DEFAULT gen_random_uuid(),
  user_id UUID REFERENCES auth.users(id) NOT NULL,
  title TEXT NOT NULL,
  content TEXT,
  created_at TIMESTAMPTZ DEFAULT now()
);

-- 2. Enable RLS immediately
ALTER TABLE notes ENABLE ROW LEVEL SECURITY;

-- 3. Create all four policies
CREATE POLICY "Users read own notes"
  ON notes FOR SELECT
  USING (auth.uid() = user_id);

CREATE POLICY "Users insert own notes"
  ON notes FOR INSERT
  WITH CHECK (auth.uid() = user_id);

CREATE POLICY "Users update own notes"
  ON notes FOR UPDATE
  USING (auth.uid() = user_id)
  WITH CHECK (auth.uid() = user_id);

CREATE POLICY "Users delete own notes"
  ON notes FOR DELETE
  USING (auth.uid() = user_id);
Copy this template. Change notes to your table name. Change the columns to match your schema. Keep the four policies. That is the entire pattern. Every table, every time.
If your app has tables with shared data (like a public blog or a product catalog), you can create a SELECT policy with USING (true) for those specific tables. But any table that stores data belonging to a specific user needs the auth.uid() = user_id pattern. No exceptions.
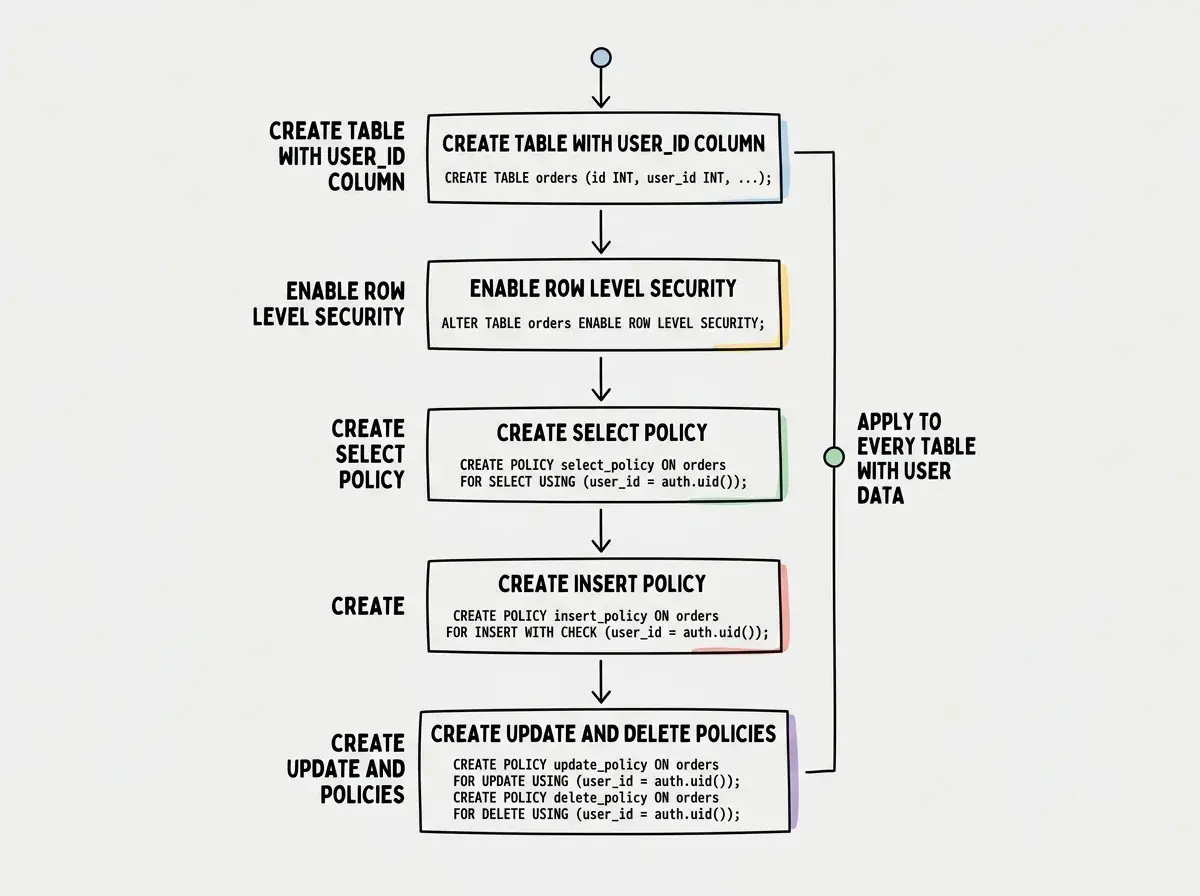
What This Means For You
Row Level Security is not an advanced feature. It is the baseline. If your Supabase project has even one table without RLS enabled, you have an open filing cabinet in a shared building. The Lovable CVE proved that 170+ applications can ship to production without anyone noticing the drawers are unlocked.
The fix is not complicated. It is methodical. Enable RLS on every table. Create four policies per table. Test as multiple users. Verify anonymous access returns nothing. This takes less than an hour for most projects and prevents the exact vulnerability that defined the biggest security incident in vibe coding history.
-
If you are a senior developer, add RLS verification to your code review checklist for any project using Supabase. Every pull request that creates or modifies a table should include the corresponding RLS policies. Treat a missing
ENABLE ROW LEVEL SECURITYline the same way you would treat a missing authentication check on an API route. -
If you are an indie hacker, run the filing cabinet test today. Sign in as two different users and verify they cannot see each other's data. If they can, you are one CVE disclosure away from being in the news for the wrong reasons. The SQL templates in this guide are copy-paste ready. Use them.
The AI built you a working app. Now install the locks.