Engineering teams rely heavily on runbooks to resolve incidents quickly and maintain system health. When an alert fires, the on-call engineer needs immediate access to the right steps. By exposing your runbooks to an AI assistant through the Model Context Protocol, you can make the selected runbook available in the same conversation. Instead of manually searching through wikis, your AI assistant can fetch the exact runbook and guide you through the process.
Retrospective edition for 2026-04-16. Researched and published September 9, 2026. Product details reflect documentation checked at publication unless explicitly identified as historical.
This tutorial demonstrates how to build a demonstration Model Context Protocol server using TypeScript. We will create a local server that exposes a specific set of runbooks to any compatible AI client. This implementation uses a fixed allowlist of runbooks, ensuring no arbitrary filesystem access or execution occurs. It serves as a foundational step before scaling up to production systems with complex authentication and dynamic document retrieval.
Initialize Your TypeScript Project for the MCP Server
To begin, you need to set up a modern Node.js environment. We will use Node version 22 and configure our project to use ECMAScript modules. This matches the pinned SDK version used here and provides a clean module resolution strategy.
First, create a new directory for your project and initialize a package.json file. You must set the type field to module in your package.json to enable native ES modules. This is the module format used by this example, not a claim that every SDK integration must use it.
Next, install the required dependencies. We need the Model Context Protocol SDK and Zod for schema validation. Run the following command to install the exact versions tested for this implementation.
npm install @modelcontextprotocol/sdk@1.26.0 zod@3.25.76
Then, install the development dependencies, including TypeScript and the Node.js type definitions.
npm install -D typescript@5.9.3 @types/node@22
You also need a build script in your package.json. Add "build": "tsc" to your scripts section. This allows you to compile your TypeScript code into JavaScript using the npm run build command.
Now, create a tsconfig.json file in the root of your project. This configuration tells the TypeScript compiler how to process your code. Use the exact configuration below to ensure compatibility with Node.js ES modules.
{
  "compilerOptions": {
    "target": "ES2022",
    "module": "NodeNext",
    "moduleResolution": "NodeNext",
    "outDir": "dist",
    "strict": true,
    "skipLibCheck": true
  },
  "include": ["src/**/*.ts"]
}
Mixing SDK versions can cause severe compatibility issues. This tutorial uses the version 1 API. Use the version 1 SDK documentation for this pinned example. Other SDK releases may use different packages or APIs; check their migration documentation before upgrading.
Implement the Core Runbook Server Logic in TypeScript
With the environment configured, we can write the server implementation. Create a directory named src and inside it, create a file named index.ts. This file will contain the entire logic for our demonstration server.
The server uses the standard input and standard output streams to communicate with the client. This is known as the stdio transport layer. When the server starts, it listens for JSON-RPC messages on standard input and writes responses to standard output. Because standard output is reserved for the protocol, you must send all application logs to standard error. If you write plain text logs to standard output, the client will fail to parse the protocol messages and the connection will drop.
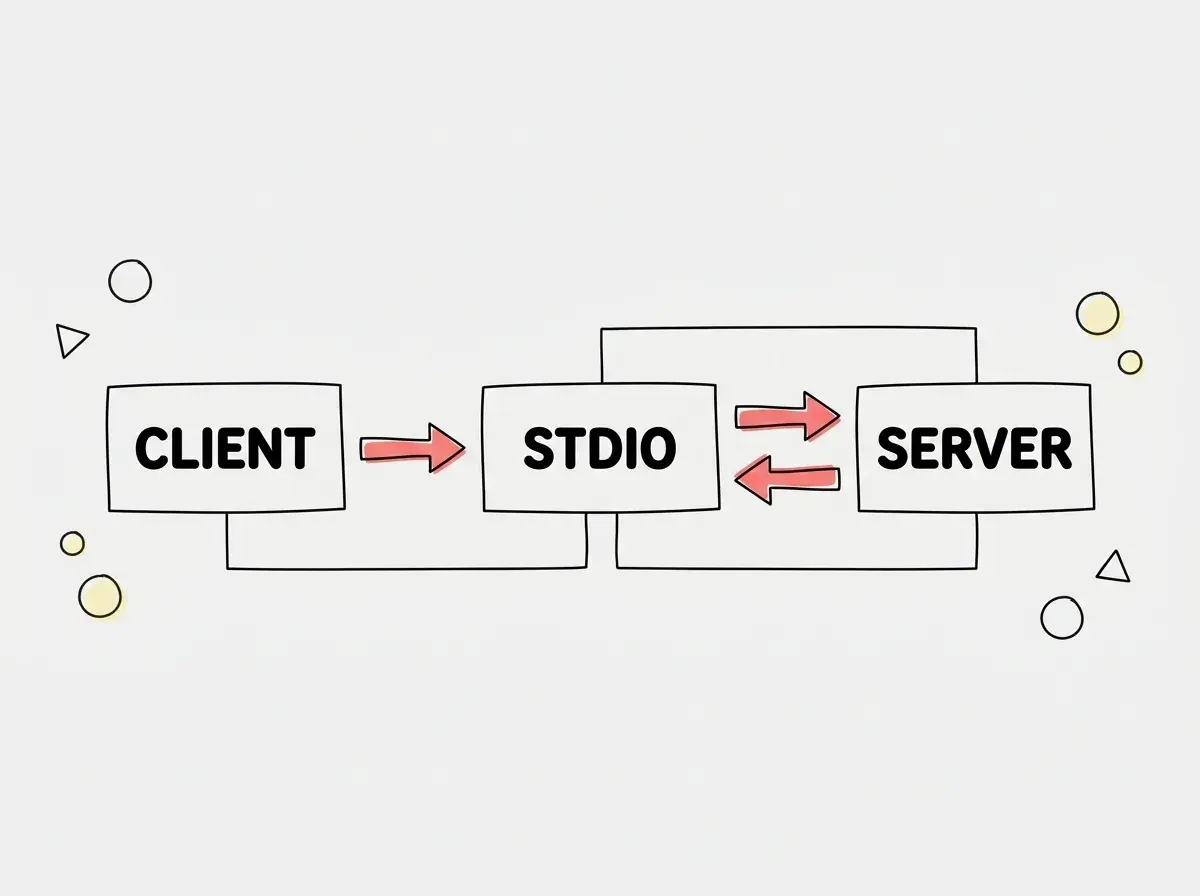
Here is the complete code for src/index.ts. It registers a single tool named read_runbook that accepts a service name and returns the corresponding runbook text.
import { McpServer } from '@modelcontextprotocol/sdk/server/mcp.js';
import { StdioServerTransport } from '@modelcontextprotocol/sdk/server/stdio.js';
import { z } from 'zod';

const runbooks = {
  checkout: { revision: 'demo-1', text: 'Inspect checkout error rate. Check provider status. Escalate to the on-call owner.' },
  catalog: { revision: 'demo-1', text: 'Check catalog freshness. Inspect the import job. Escalate if the job is failing.' },
} as const;
const server = new McpServer({ name: 'team-runbooks', version: '1.0.0' });
server.registerTool('read_runbook', {
  description: 'Read a demonstration runbook for checkout or catalog. Does not execute its steps.',
  inputSchema: { service: z.enum(['checkout', 'catalog']) },
}, async ({ service }) => ({
  content: [{ type: 'text', text: JSON.stringify({ service, ...runbooks[service] }) }],
}));
await server.connect(new StdioServerTransport());
Notice how we use Zod to define the input schema. The z.enum ensures that the client can only request runbooks for the checkout or catalog services. Any attempt to request an invalid service will be rejected by the SDK before our handler even executes. This provides a strong layer of security and predictability.
If you compile this code using npm run build and then execute node dist/index.js, the process will appear to hang. This is the expected behavior. The server is waiting for standard input from a client. It will not terminate until the standard input stream is closed.
Explore clear explanations of AI coding tools, project context, and reliable development workflows.
Explore the blogAutomate Testing for Your Runbook Server Initialization
Testing an application that communicates over standard input and output requires a specific approach. We cannot simply mock HTTP requests. Instead, we must spawn the server process and communicate with it using a client transport.
The Model Context Protocol SDK provides a client implementation that makes this straightforward. We will create a test script that spawns our compiled server, connects to it, discovers the available tools, and verifies that the read_runbook tool behaves correctly.
Create a file named test.mjs in the root of your project. We use the .mjs extension to explicitly denote this as an ES module script.
import assert from 'node:assert/strict';
import {Client} from '@modelcontextprotocol/sdk/client/index.js';
import {StdioClientTransport} from '@modelcontextprotocol/sdk/client/stdio.js';
const client=new Client({name:'runbook-check',version:'1.0.0'});
await client.connect(new StdioClientTransport({command:process.execPath,args:['dist/index.js']}));
try {
 const listed=await client.listTools();assert.equal(listed.tools[0].name,'read_runbook');
 const result=await client.callTool({name:'read_runbook',arguments:{service:'checkout'}});
 assert.equal(JSON.parse(result.content[0].text).revision,'demo-1');
 let rejected=false;try{const r=await client.callTool({name:'read_runbook',arguments:{service:'../../secret'}});rejected=!!r.isError;}catch{rejected=true;}assert.ok(rejected);
 console.log('PASS initialization, tool discovery, valid lookup, invalid identifier rejection');
}finally{await client.close();}
This test script performs several critical validations. First, it verifies that the server successfully initializes and returns the expected tool name during the discovery phase. Second, it calls the tool with a valid argument and asserts that the returned revision matches our fixed data. Finally, it attempts a path traversal attack by requesting ../../secret. The test asserts that this invalid lookup is rejected, confirming our Zod schema validation is working properly.
Run the test using the command node test.mjs. You should see the success message printed to your console.
This integration test spawns the actual Node process. By using the official client SDK in your test scripts, you check transport initialization and the specific lookup cases covered by the test.
Configure the Cursor Editor to Use Your New MCP Server
Once your server is built and tested, you can integrate it with compatible AI assistants. The Cursor editor supports the Model Context Protocol, allowing its built in AI to leverage your local tools.
To connect your server to Cursor, you need to modify the Cursor configuration. You will provide a JSON configuration that specifies the command to run and the arguments to pass. Because Cursor needs to know exactly where your compiled code lives, you must provide the absolute path to the dist/index.js file.
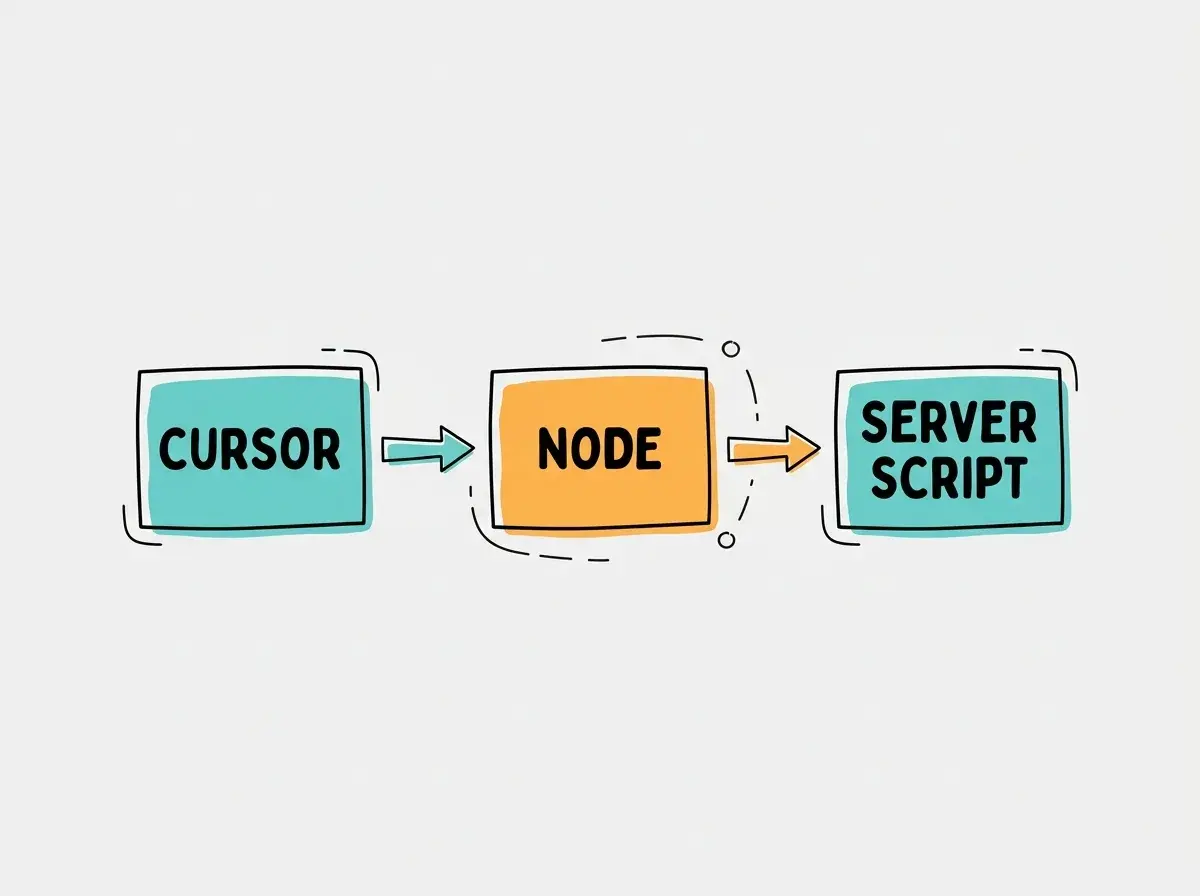
See the Cursor MCP configuration documentation for .cursor/mcp.json and user-level configuration. In your Cursor settings, locate the Model Context Protocol section and add a new stdio server. The command will be node and the arguments will be the absolute path to your distribution file. Once connected, you can ask the Cursor AI to "read the checkout runbook" and inspect the proposed tool call and verify that its returned text matches the fixture.
When planning for the future, consider the scope of your runbook server. This demonstration uses a hardcoded allowlist. Real world implementations will need to connect to document repositories, wikis, or incident management platforms. As you expand the server, you will need to implement robust authentication mechanisms to ensure that the AI client only accesses runbooks that the current user is authorized to view.
| Design choice | Fixed demonstration data | Dynamic document source |
|---|---|---|
| Retrieval | Two in-memory entries | API or storage access must be implemented |
| Access boundary | No document lookup outside the enum | Enforce authorization for every lookup |
| Updates | Change code and rebuild | Define freshness and failure behavior |
| Remaining risk | Dependencies and process permissions | Those risks plus credentials and external content |
Neither design is automatically secure. The fixed example is easier to inspect because its behavior is deliberately small.
Define What the Example Does Not Execute
The returned runbook text is reference material. Reading “check provider status” does not authorize the assistant to visit an account, change a service, or page an engineer. Keep retrieval separate from operational actions. If you later expose an action tool, give it a distinct name, narrowly scoped input, and an authorization policy suited to the consequences of that action.
The revision field is useful when reviewing an answer. Ask the client to show which service and revision it received, then compare them with the current source. In a dynamic implementation, include enough provenance to identify the document and its update time. Avoid claiming that a retrieved document is current unless your retrieval path actually checks freshness.
Test failure behavior before adding more services. An unknown identifier should produce an explicit failure rather than falling back to an unrelated runbook. A document-source outage should remain distinguishable from “no runbook exists.” Do not return a success-shaped empty string that encourages the assistant to fill in missing operational steps from memory.
This tutorial’s transport test does not evaluate Cursor’s reasoning or prove that the assistant follows an incident procedure correctly. It checks initialization, tool discovery, a known lookup, and rejection of an invalid identifier. Add tests for new behavior as the server grows, and keep any incident-response decisions with the responsible operator until the broader workflow has been reviewed.
Frequently Asked Questions About MCP Implementations
What This Means For Your Team and Future Operations
Building a custom Model Context Protocol server for your team runbooks is a practical step toward intelligent incident management. By standardizing how AI assistants access operational knowledge, you reduce the cognitive load on engineers during high pressure situations.
The enum constrains the tool’s input, and this implementation contains no file reads or command execution. Stdio is a transport, not an isolation boundary; the Node process still has its operating-system permissions. As you scale this implementation, you can integrate it with your existing documentation platforms, transforming static wikis into dynamic, context aware operational tools.
Read more practical articles for choosing tools, reviewing changes, and shipping useful software.
Read more guides