Most blog tutorials hand you a template and tell you to customize it. That approach works until you want something the template did not anticipate, and then you are stuck reverse-engineering someone else's decisions. This tutorial takes a different path. You will build a blog from scratch using MDX, Next.js, and AI coding tools, understanding every layer as you go. By the end, you will have a working blog with custom components, styled with Tailwind, deployed to a live URL on Vercel.
Think of MDX as building with LEGO. Markdown gives you the basic bricks for text, headings, lists, and links. MDX snaps React components onto those bricks, giving you callout boxes, interactive code blocks, image galleries, and anything else you can imagine. Every component you build is a reusable brick you can drop into any post. The more bricks you create, the more expressive your blog becomes without writing more code.
Why MDX Is the Best Format for a Blog in 2026
Markdown is the default format for developer blogs, and for good reason. It is fast to write, easy to read in its raw form, and supported by practically every tool in the ecosystem. But plain Markdown hits a ceiling quickly. You cannot embed a styled callout, a tabbed code example, or an interactive chart without falling back to raw HTML or hacky workarounds.
MDX removes that ceiling. It lets you import and use React components directly inside your Markdown files. Your content stays readable (it is still mostly Markdown), but you get the full power of React wherever you need it. A blog post can include <Callout> for key insights, <BlogImage> for responsive images with captions, and <CTA> for conversion points, all without leaving the content file.
The practical upside is that your writing workflow and your component library grow independently. Writers (even non-technical ones) can author posts in Markdown they already know. Developers can build new components once and make them available across every post. When you need a new visual element, you build one brick and every post can use it immediately.
MDX is Markdown with superpowers. You keep the simplicity of writing in plain text, but you gain the ability to embed any React component directly in your content. For a blog, this means your design system and your content format speak the same language.
Setting Up Next.js with MDX Rendering
Let's build something real. Start by creating a new Next.js project. Open your terminal and run the setup command.
npx create-next-app@latest my-blog --typescript --tailwind --app --src-dir
cd my-blog
Next, install the MDX rendering library. We will use next-mdx-remote-client, which lets you load MDX files at build time and render them as React components.
npm install next-mdx-remote-client gray-matter
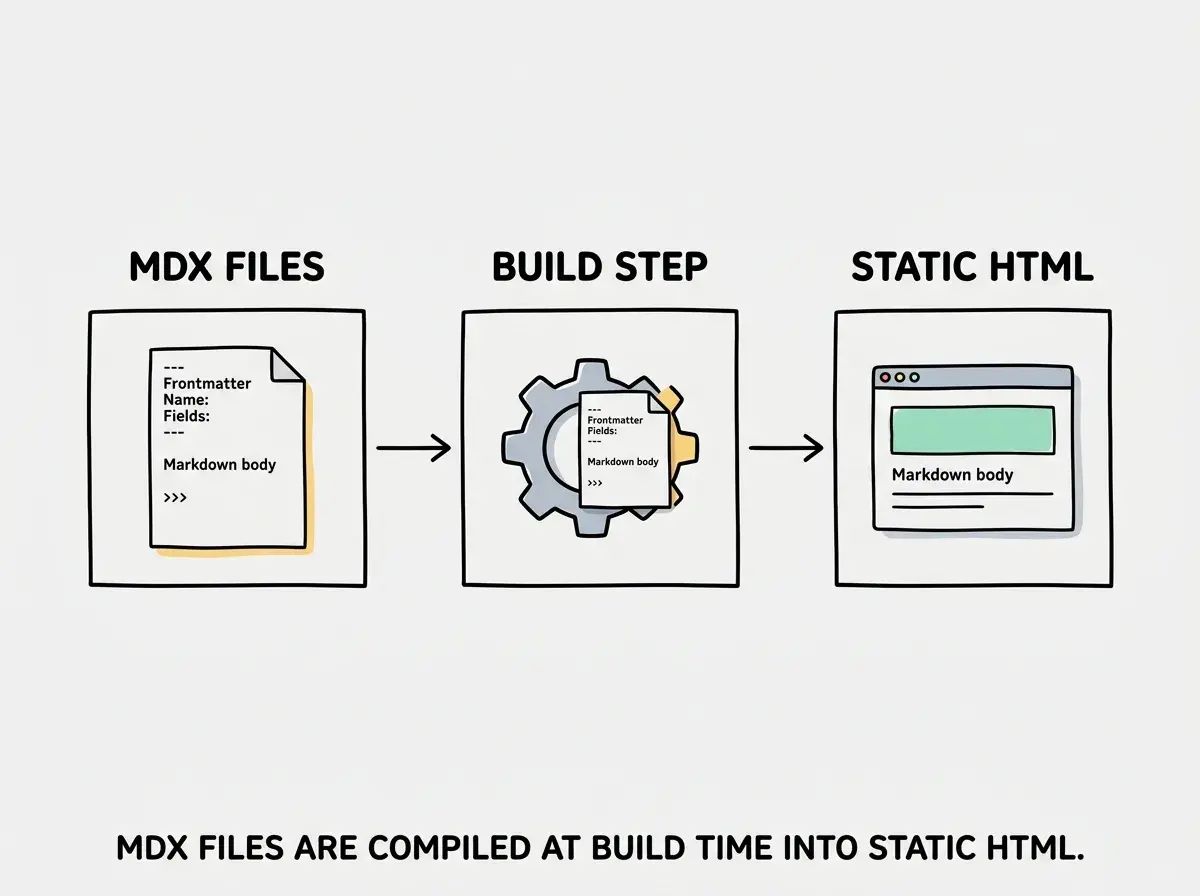
gray-matter parses the YAML frontmatter at the top of each MDX file. Frontmatter is metadata about each post (title, date, description, tags) stored right in the content file itself. This keeps everything about a post in one place instead of splitting content and metadata across files or databases.
Create a folder structure for your blog content. Each post gets its own directory with an index.mdx file inside.
content/
  blog/
    my-first-post/
      index.mdx
    building-in-public/
      index.mdx
This folder-per-post pattern matters because it lets you colocate images, data files, and other assets alongside each post. As your blog grows, this structure scales cleanly.
Now create the function that reads your MDX files. Add a file at src/lib/blog.ts that uses Node's fs module to scan the content directory, parse frontmatter with gray-matter, and return an array of post objects.
import fs from 'fs';
import path from 'path';
import matter from 'gray-matter';

const BLOG_DIR = path.join(process.cwd(), 'content/blog');

export function getAllPosts() {
  const slugs = fs.readdirSync(BLOG_DIR);
  return slugs
    .map((slug) => {
      const file = fs.readFileSync(
        path.join(BLOG_DIR, slug, 'index.mdx'),
        'utf-8'
      );
      const { data, content } = matter(file);
      return { slug, frontmatter: data, content };
    })
    .sort((a, b) =>
      new Date(b.frontmatter.date).getTime() -
      new Date(a.frontmatter.date).getTime()
    );
}
This function runs at build time only, not in the browser. Next.js calls it when generating your pages, reads the MDX files from disk, and bakes the result into static HTML. Your blog loads instantly for visitors because there is no runtime file reading or database queries.
Creating Blog Posts with Frontmatter
Every MDX file starts with a frontmatter block. This is YAML between triple dashes at the top of the file. Here is what a real post looks like.
---
title: "Building in Public as a Solo Founder"
date: 2026-04-01
description: "Why sharing your process builds trust faster than sharing your product."
tags:
  - indie-hacking
  - building-in-public
status: published
---

Your content starts here. Write in plain Markdown.

Use **bold** for emphasis, [links](https://example.com)
for references, and `code` for technical terms.
The frontmatter fields are entirely up to you. Start with the basics (title, date, description, tags, status) and add more as your needs evolve. Common additions include heroImage for a cover image, category for filtering, and difficulty for sorting tutorials by skill level.
The status field is especially useful. Set posts to draft while writing and published when ready. Your listing page can filter out drafts so they never appear on the live site, but you can still preview them locally during development.
Listing Posts on a Homepage
Your homepage needs to display a list of all published posts. In Next.js App Router, create or edit src/app/page.tsx to call getAllPosts() and render a list.
import { getAllPosts } from '@/lib/blog';
import Link from 'next/link';

export default function HomePage() {
  const posts = getAllPosts().filter(
    (p) => p.frontmatter.status === 'published'
  );

  return (
    <main className="mx-auto max-w-2xl px-4 py-16">
      <h1 className="text-4xl font-bold mb-8">My Blog</h1>
      {posts.map((post) => (
        <article key={post.slug} className="mb-8">
          <Link href={`/${post.slug}`}>
            <h2 className="text-2xl font-semibold hover:underline">
              {post.frontmatter.title}
            </h2>
          </Link>
          <p className="text-gray-600 mt-1">
            {post.frontmatter.description}
          </p>
          <time className="text-sm text-gray-400">
            {post.frontmatter.date}
          </time>
        </article>
      ))}
    </main>
  );
}
Because getAllPosts() is called inside a Server Component (the default in App Router), it runs at build time. The resulting HTML is fully static. No API calls, no loading spinners, no client-side JavaScript for the listing page. Your homepage is fast by default.
For the individual post page, create a dynamic route at src/app/[slug]/page.tsx. This file uses the slug from the URL to find the matching MDX file, compile it with next-mdx-remote-client, and render it with your custom components.
Styling with Tailwind and Making It Look Good
Tailwind CSS ships with your Next.js project if you selected it during setup. For blog content, the key is the @tailwindcss/typography plugin, which provides beautiful default styles for rendered Markdown.
npm install @tailwindcss/typography
Wrap your rendered MDX content in an element with the prose class, and Tailwind Typography handles headings, paragraphs, lists, code blocks, and blockquotes with sensible defaults.
<article className="prose prose-lg mx-auto">
  <MDXContent components={mdxComponents} />
</article>
That single prose class transforms raw HTML from unstyled text into a readable blog post with proper spacing, font sizes, and visual hierarchy. You can customize every aspect with Tailwind's modifier syntax (prose-headings:text-blue-900, prose-a:text-teal-600, and so on) without writing custom CSS.
Start with the fundamentals before diving into your blog project.
Explore the basicsAdding Custom MDX Components
This is where MDX truly separates itself from plain Markdown. You can create React components and make them available inside any blog post without importing them.
Build a simple Callout component at src/components/content/callout.tsx.
export default function Callout({
  title,
  children,
}: {
  title: string;
  children: React.ReactNode;
}) {
  return (
    <div className="rounded-lg border-l-4 border-teal-500 bg-teal-50 p-4 my-6">
      <p className="font-semibold text-teal-900">{title}</p>
      <div className="text-teal-800 mt-1">{children}</div>
    </div>
  );
}
Register it in a components map and pass that map to your MDX renderer.
import Callout from '@/components/content/callout';

export const mdxComponents = { Callout };
Now any MDX file can use <Callout title="Important"> without an import statement. The component just works. This is the LEGO principle in action. Build a brick once, snap it into any post forever.
Good candidates for custom components include callout boxes for key insights, styled code blocks with copy buttons, image components with captions and lazy loading, step-by-step instruction blocks, and call-to-action sections for newsletter signups or product links. Start with two or three components and add more as your content needs evolve.
Deploying Your Blog to Vercel
Your blog is built from static files generated at build time, which makes deployment straightforward. Push your code to a GitHub repository, then connect that repository to Vercel.
Step 1: Create a GitHub repository and push your project to it. If you are using an AI coding tool, it likely has a "push to GitHub" button that handles this for you.
Step 2: Go to vercel.com and sign up with your GitHub account. Click "Add New Project" and select your blog repository. Vercel auto-detects Next.js and configures the build settings.
Step 3: Click Deploy. Vercel installs dependencies, runs next build, and assigns your blog a live URL within two to three minutes.
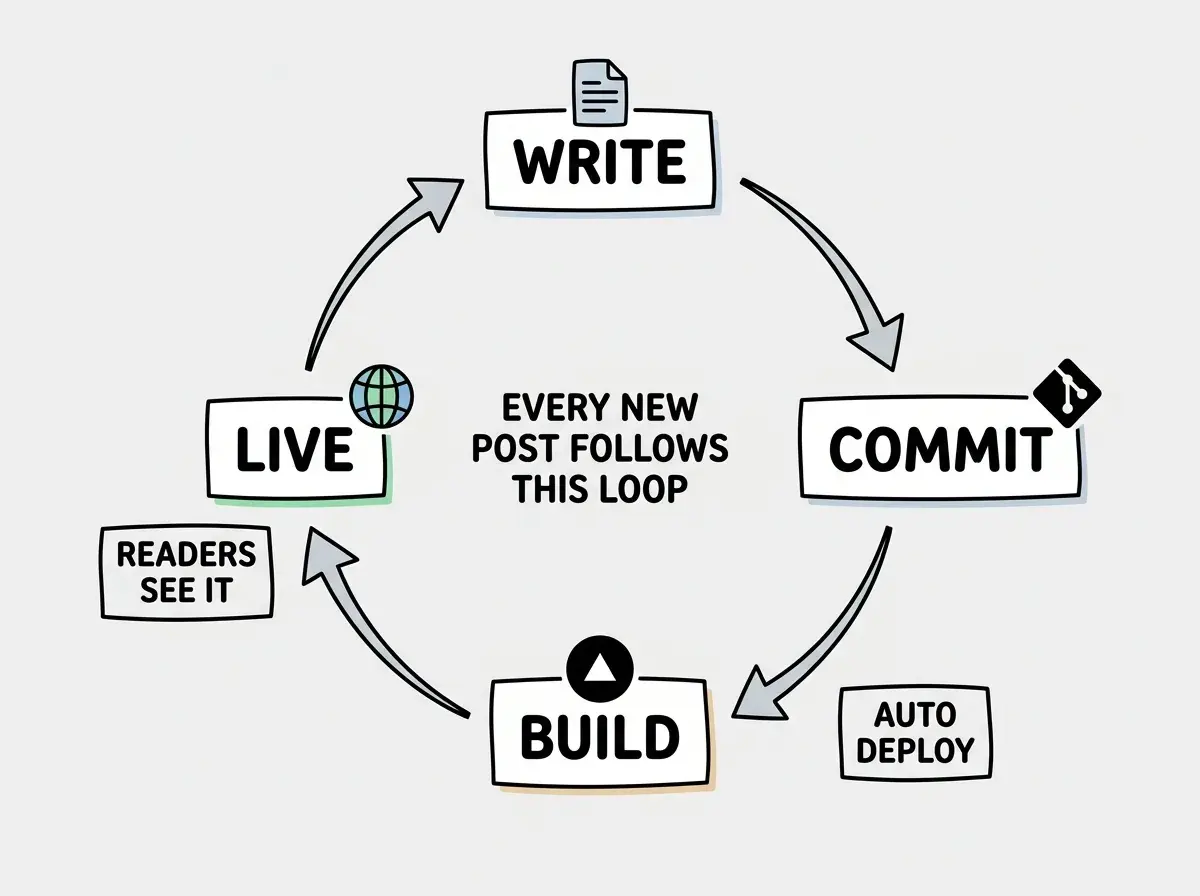
From this point forward, every push to your main branch triggers an automatic redeploy. Write a new post, commit the MDX file, push to GitHub, and your blog updates itself. No manual deployment steps, no FTP uploads, no server management.
Overbuilding before publishing. Your first version needs a homepage, a post page, and one or two custom components. That is it. You do not need categories, search, RSS, dark mode, analytics, or comments on day one. Ship the minimal version, write a few posts, and let real usage tell you what features to add next. The blog that exists with three posts beats the blog that is "almost ready" with zero.
If you want a custom domain, add it in your Vercel project settings under "Domains." Point your domain's DNS to Vercel's nameservers, and SSL is provisioned automatically.
What This Means For You
You just walked through every layer of building a blog with MDX. You understand why MDX exists (Markdown with React component superpowers), how the build pipeline works (files parsed at build time into static HTML), and how deployment automates the publishing loop. More importantly, you now have a system that grows with you. Every component you build makes every future post more expressive.
- If you are an indie hacker building in public, this blog setup is your distribution channel. MDX components let you embed product demos, pricing tables, and signup forms directly in your posts. You own the platform, you control the design, and you are not paying a CMS $30 a month. Write your first post about what you are building, deploy it tonight, and start sharing.
- If you are a creative who wants a portfolio blog, MDX gives you the design flexibility that WordPress and Substack cannot. Custom image galleries, styled project showcases, and interactive before-and-after comparisons are all just components you build once and reuse. Your blog looks like your brand, not like a template.
The blog you just built is a foundation. Add an RSS feed when you want subscribers. Add search when you have twenty posts. Add analytics when you want to know what resonates. But none of those features matter until you have published your first post. Write it, commit it, push it, and watch it go live.
Follow the complete zero-to-shipped series and go from idea to live product.
Start the series