Vercel is where most vibe coders deploy their first project, and for good reason. It was built by the team behind Next.js, so the integration is seamless. But "seamless" does not mean "foolproof," and I have watched dozens of first-time deployers hit the same walls. This guide walks through exactly what to do, in order, with the real error messages you will see and how to fix each one.
If your AI tool generated a Next.js app (and there is a good chance it did, since most AI coding tools default to Next.js), Vercel is the fastest path from localhost to a live URL. The free tier is generous enough for any MVP or side project, and you will not need a credit card to get started.
Before You Start
You need three things before touching Vercel. First, your code needs to be on GitHub. If it is only on your local machine, push it to a GitHub repository. Your AI tool probably created a Git repository for you already. If not, open your terminal in the project folder and run git init, then git add ., then git commit -m "initial commit", then create a repo on GitHub and push to it.
Second, you need a Vercel account. Go to vercel.com and sign up with your GitHub account. Using GitHub signup is important because it connects the two services automatically and saves you a configuration step later.
Third, you need your .env file open and visible. You are going to need every single value in it. I keep mine open in a separate window throughout the entire deployment process. This one habit has saved me more debugging time than any other.
Import Your Repository
Log into Vercel and click "Add New Project." Vercel will show you a list of your GitHub repositories. Find the one you want to deploy and click "Import."
If your repository does not appear in the list, click "Adjust GitHub App Permissions" and grant Vercel access to the repository. This is a common first stumble. Vercel can only see repositories you have explicitly given it permission to access.
Vercel auto-detects Next.js projects and pre-fills your build settings correctly about 90% of the time. The remaining 10% usually involves custom output directories or monorepo configurations. If Vercel detects your framework as "Other" instead of "Next.js," check that you have a next.config.ts or next.config.js file in your project root.
After importing, Vercel shows you a configuration screen with three fields: Framework Preset, Build Command, and Output Directory. For a standard Next.js project, these should be pre-filled as "Next.js," next build, and blank (Vercel knows where Next.js puts its output). Do not change these unless you have a specific reason to.
Add Every Environment Variable
This is the step that causes the most failures and the most confusion. Scroll down on the configuration screen to the "Environment Variables" section. You need to add every variable from your .env file here.
Go through your .env file line by line. For each line, take the variable name (everything before the = sign) and put it in the "Key" field. Take the value (everything after the = sign) and put it in the "Value" field. Click "Add" after each one.
Common variables you might need to add include database URLs, API keys for services like Stripe or OpenAI, authentication secrets, and any NEXT_PUBLIC_ variables your app uses for client-side configuration.
A critical detail that catches many people: variables that start with NEXT_PUBLIC_ are embedded into your JavaScript bundle at build time. If you add or change a NEXT_PUBLIC_ variable after deployment, you must redeploy for the change to take effect. Regular (non-public) environment variables are read at runtime and can take effect without redeployment, but only in server-side code like API routes.
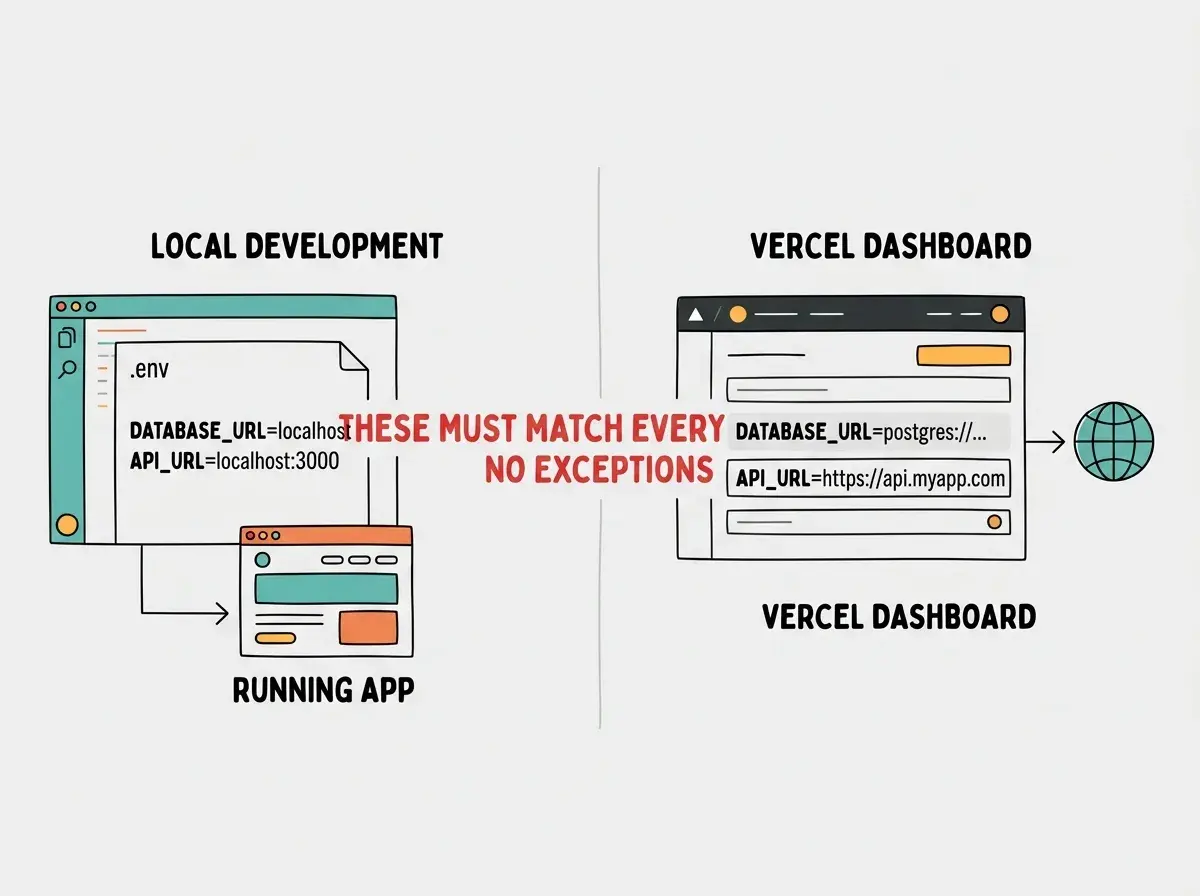
Do not skip variables you think are optional. If your code references a variable, it needs to exist in production. A missing variable does not always cause a build error. Sometimes the app builds fine but crashes when a user triggers the feature that needs that variable. Those are the worst bugs because they are invisible until a real person encounters them.
Click Deploy and Watch the Logs
Click "Deploy." Vercel will pull your code from GitHub, install your dependencies, run your build command, and make the result available at a URL. This process takes between one and five minutes depending on your project size.
Watch the build logs in real time. They scroll by in the Vercel dashboard and show you exactly what is happening at each step. If the build fails, the error will be in these logs. The most common build errors and their fixes follow.
"Module not found: Can't resolve..." means your code imports a package that is not in your package.json. This happens when your AI tool used a package but forgot to add it as a dependency. Fix it by running npm install [package-name] locally, committing the updated package.json and package-lock.json, and pushing to GitHub. Vercel will automatically redeploy.
"Type error: ..." means TypeScript found a type mismatch. Your local dev server may have ignored this, but the build is strict. Read the error message carefully. It tells you the file name, line number, and what types it expected versus what it got. Fix the code, commit, and push.
"Error: ENOENT: no such file or directory" means your code references a file that does not exist in the repository. This often happens with images or configuration files that exist on your machine but were not committed to Git. Check your .gitignore to see if the file is being excluded.
Set Up Your Custom Domain
After a successful deployment, Vercel gives you a URL like your-project.vercel.app. This works fine for testing, but if you want a custom domain, you have a few more steps.
In your Vercel project dashboard, go to "Settings" then "Domains." Enter your custom domain and click "Add." Vercel will show you DNS records that you need to add at your domain registrar (wherever you bought your domain, like Namecheap, Google Domains, or Cloudflare).
The two records you typically need are an A record pointing to Vercel's IP address and a CNAME record for the www subdomain. Vercel's dashboard shows you exactly what to enter. Copy these values into your domain registrar's DNS settings.
DNS changes take anywhere from a few minutes to 48 hours to propagate, though most complete within 30 minutes. Vercel will automatically provision an SSL certificate for your domain once the DNS records are verified, so your site will be served over HTTPS without any additional configuration.
Forgetting to update NEXT_PUBLIC_ environment variables after adding a custom domain. If your app has a NEXT_PUBLIC_URL or NEXT_PUBLIC_SITE_URL variable that is still set to your .vercel.app URL, features like OAuth callbacks, social sharing images, and canonical URLs will point to the wrong domain. Update the variable in Vercel's dashboard and redeploy.
Enable Automatic Deployments
By default, Vercel deploys automatically every time you push to your main branch on GitHub. This means every git push triggers a new deployment. You do not need to visit the Vercel dashboard to redeploy manually.
Vercel also creates "Preview Deployments" for every pull request. When you or your AI tool creates a pull request on GitHub, Vercel builds that branch and gives it a unique URL so you can test changes before merging them into your main branch. This is one of Vercel's best features and requires zero configuration.
If you want to disable automatic deployments (for example, if you want to control exactly when deployments happen), you can do so in "Settings" then "Git" then "Deploy Hooks." But for most vibe coders, automatic deployments are exactly what you want. Push your code, and it goes live.
Understand deployment fundamentals before diving into platform specifics.
Learn the basicsCommon Post-Deployment Issues
Even after a successful deployment, you might encounter issues that did not appear during local development.
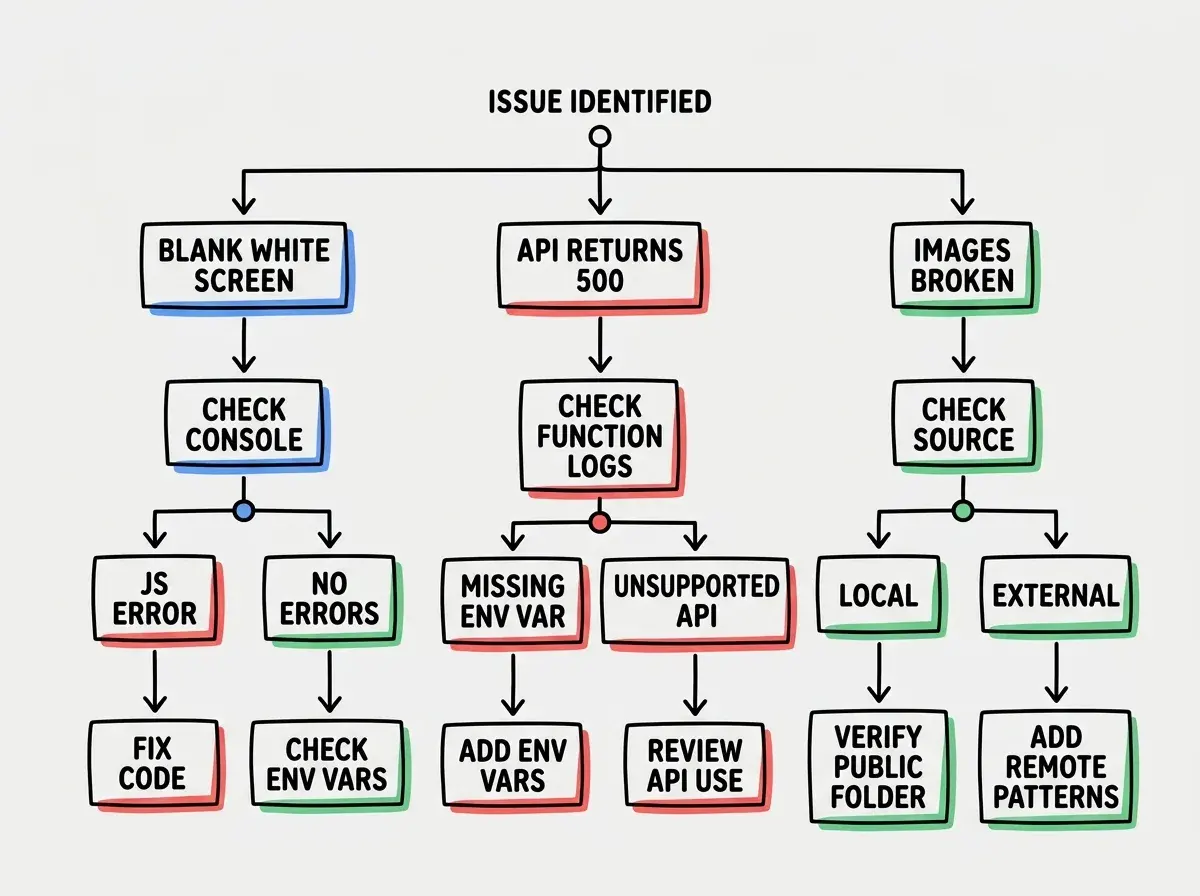
Blank white screen. Open your browser's developer console (right-click, "Inspect," then "Console"). The most common cause is a missing environment variable. Check Vercel's "Runtime Logs" under your latest deployment.
API routes returning 500 errors. Almost always a missing environment variable or an unsupported Node.js API in Vercel's serverless functions. Check the function logs under "Logs" in the dashboard.
Images not loading. If images reference external URLs, make sure your next.config.ts includes the correct remotePatterns for those domains. Without this configuration, Next.js blocks external images.
Slow initial page loads. Vercel's serverless functions have a "cold start" period on the first request. This is normal. Subsequent requests are faster.
Redeployment and Rollbacks
Every Vercel deployment is immutable. Vercel keeps a snapshot of every version you have ever deployed. If you push a change that breaks your site, go to "Deployments," find the last working version, click the three-dot menu, and select "Promote to Production." Your site reverts in seconds.
This safety net makes deployment much less scary. Push changes confidently knowing that if something goes wrong, the fix is a single click away.
What This Means For You
Vercel removes most of the complexity from deploying Next.js applications. The platform handles infrastructure, SSL, CDN distribution, and automatic deployments. Your job is to make sure your environment variables are correct and your build succeeds. Everything else is managed for you.
- If you are a founder: Vercel's free tier is sufficient for validating your idea with real users. You can deploy your MVP in under ten minutes and start getting feedback today. Do not spend money on infrastructure until you have users who are actually using what you built. The free tier handles significant traffic, and upgrading is painless when you need it.
- If you are a career changer: Vercel's preview deployments let you test every change before it goes live. Create branches for new features, let Vercel build previews, test them thoroughly, then merge. This workflow is how professional teams ship, and demonstrating that you know it signals real-world competence to hiring managers.
- If you are a student: Deploy every project you build to Vercel and add the live URLs to your portfolio. A GitHub repository shows that you can write code. A live Vercel deployment shows that you can ship it. Employers and clients consistently value deployed projects over code-only portfolios because deployment demonstrates practical, end-to-end capability.
Deployment is step one. Securing your shipped app is step two.
Read the security guide