You built something with AI. It works on your machine. It looks great in the preview. And now you need the rest of the world to see it. This is where most vibe-coded projects quietly die, not because the code is broken, but because the builder never figured out how to get it off their laptop. 92% of US developers now use AI coding tools daily, and a growing number of them are non-technical founders, career changers, and marketers building their first real projects. The tool generated the code. The tool ran the preview. But the tool did not deploy it for you.
This is the 70% wall in miniature. You got 70% of the way to a shipped product in record time, and now the last 30% feels like a different language. I have been there. The deployment step is simpler than it looks once you see what is actually happening.
Think of it like packing for a move. You have been living comfortably in your apartment (localhost). Everything is where you expect it. The lights work, the fridge is stocked, you know which drawer has the bottle opener. Deployment is packing up that apartment, driving to the new place, and unpacking so everything works again. The furniture is the same. The layout might be different. You will definitely forget something in a closet. But once you have moved once, every move after that gets faster.
How Can I Deploy My First App
The fastest path for most vibe-coded projects is Vercel. If your AI tool generated a Next.js app (and there is a strong chance it did, since Cursor, Bolt, Lovable, and most popular tools default to Next.js or React), Vercel was built for exactly this. Free tier, no credit card, and your app goes live in minutes once you know the steps.
Here is the exact sequence. No skipping ahead, no shortcuts, no "you should already know this" assumptions.
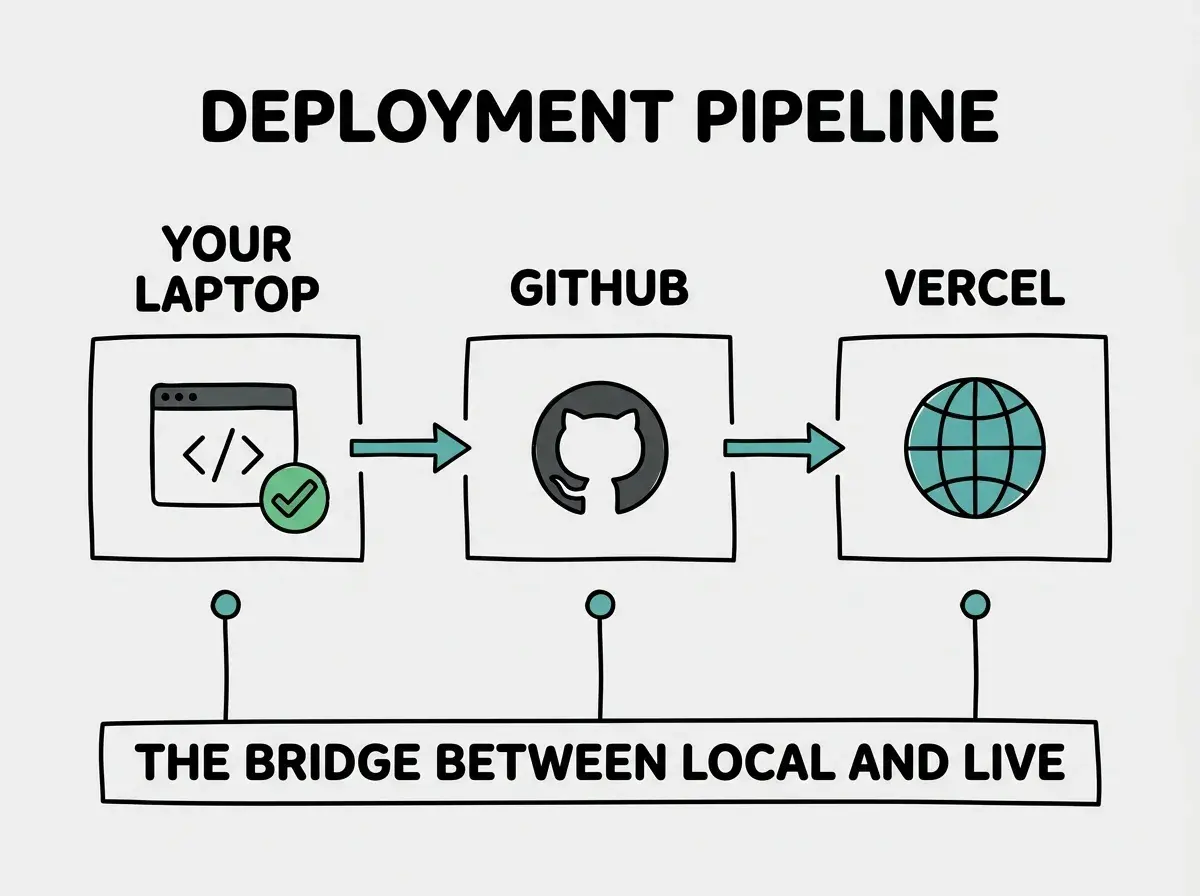
Step 1: Get your code on GitHub. Your AI tool may have already created a Git repository. If you see a .git folder in your project, you are halfway there. Create a new repository on github.com and push your code to it. If your tool has a "push to GitHub" button (Lovable and Replit both do), use that instead. Your code needs to live on GitHub, not just on your computer.
Step 2: Create a Vercel account using your GitHub login. Go to vercel.com and sign up with GitHub. This connects the two services automatically. If you sign up with email instead, you will need to manually authorize GitHub later, which is one more place for things to go wrong.
Step 3: Import your repository. Click "Add New Project" in Vercel's dashboard. Find your repository in the list and click "Import." If your repo does not appear, click "Adjust GitHub App Permissions" and grant Vercel access. This trips up almost everyone the first time.
Step 4: Verify your build settings. Vercel auto-detects Next.js projects and pre-fills the build command (next build) and framework preset. For a standard project, you should not need to change anything here. If Vercel shows your framework as "Other," double-check that your project root contains a next.config.ts or next.config.js file.
Step 5: Add your environment variables. This is the step where most deployments fail. Open your project's .env file. For every line in that file, add the variable name and value into Vercel's "Environment Variables" section. Do not skip any. Do not assume any are optional. If your code references a variable and it does not exist on Vercel, your app will either fail to build or break at runtime with no obvious error message.
Going back to the moving analogy: environment variables are like your utilities. Your apartment works because electricity, water, and internet are connected. The new place has the same outlets, but nothing is plugged in until you call the utility companies. Miss one, and something stops working.
Step 6: Click Deploy. Vercel pulls your code from GitHub, installs dependencies, runs the build, and assigns your project a URL. This takes one to five minutes. Watch the build logs scroll by. If something fails, the error will be right there in the logs.
The single most important thing you can do before clicking deploy is add every environment variable from your .env file into Vercel's dashboard. Not most of them. All of them. Missing environment variables cause roughly 80% of first-deployment failures, and the errors they produce are often vague or delayed, making them hard to trace back to the actual cause. Copy them one by one. It takes two minutes and saves two hours of debugging.
What to Do When the Build Fails
Your first deploy will probably fail. That is not pessimism; that is statistics. Here are the three errors you are most likely to see, and exactly how to fix each one.
"Module not found: Can't resolve [package-name]." Your code uses a library not listed in package.json. Your AI tool used it but forgot to save it as a dependency. Fix: run npm install [package-name] locally, commit the updated package.json and package-lock.json, and push to GitHub. Vercel redeploys automatically.
"Type error" or "Build error" with a file name and line number. TypeScript found a problem your local dev server was ignoring. The build is stricter than the preview. Read the error carefully; it tells you the file and line to fix. Make the fix, commit, push.
Blank white screen after successful deployment. The build worked, but the app is broken at runtime. Open your browser's developer console (right-click, Inspect, Console tab). Nine times out of ten, this is a missing environment variable. Check Vercel's environment variables against your .env file again.
Every failure follows the same loop: read the error, fix locally, commit, push. Vercel detects new code on GitHub and redeploys automatically. You never need to click "Deploy" again manually.
How Much Does It Cost to Deploy an App
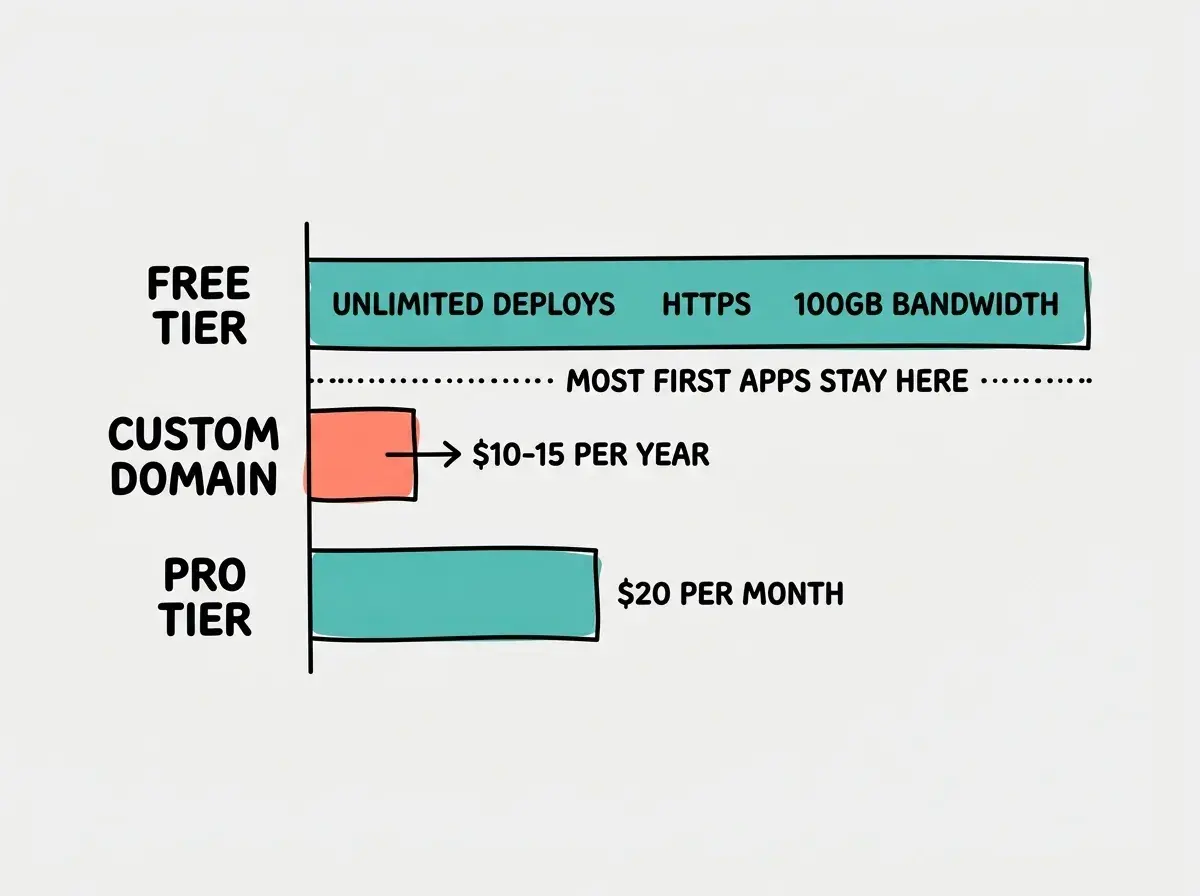
For your first app, the answer is almost certainly zero. Vercel's free tier (called "Hobby") gives you unlimited deployments, automatic HTTPS, a .vercel.app subdomain, 100GB of bandwidth per month, and serverless function execution. That is more than enough for an MVP, a portfolio project, or a side project with real users.
You do not need to enter a credit card. You do not need to choose a plan. The free tier is the default when you sign up.
The costs that might come later (and only if your project grows) are custom domains ($10 to $15 per year) and Vercel's Pro tier ($20 per month) if you need team features or more bandwidth. But for getting your first app live, the total cost is zero dollars.
This is worth emphasizing because cost anxiety stops people from deploying. I have talked to founders who assumed hosting would cost hundreds per month. For a first app, you need a GitHub account and a Vercel account. Both are free.
Setting Up a Custom Domain
Your deployed app gets a URL like your-project.vercel.app. That works fine for sharing and testing. But if you want a custom domain (like yourapp.com), the process is straightforward.
Buy a domain from a registrar like Namecheap or Cloudflare ($10 to $15 per year). In your Vercel project settings, go to "Domains," enter your custom domain, and click "Add." Vercel shows you DNS records to add at your registrar. Copy those values, wait five minutes to a few hours for DNS to propagate, and Vercel automatically provisions an SSL certificate. Your site gets served over HTTPS with no extra configuration.
One important detail: if your app has a NEXT_PUBLIC_URL or similar variable referencing the old .vercel.app URL, update it to your custom domain and redeploy. Otherwise, social sharing previews and OAuth redirects will point to the wrong address.
Waiting to deploy until everything is "finished." Deployment is not the final step of building; it is one of the first. Deploy early, even if your app is rough, because half the bugs you will encounter only appear in production. The sooner you deploy, the sooner you find and fix those bugs. Perfectionism before deployment is the number one project killer for vibe coders. Get it live, then improve it live.
Once your domain is connected and your app is live, you have crossed the biggest gap in the entire vibe coding workflow. Everything from here is iteration.
Understand what happens under the hood when you ship your app.
Learn the fundamentalsWhat to Do After Your First Successful Deploy
Your app is live. Open the URL on your phone. Send it to a friend. Paste it into a group chat. This is real, and you should take a moment to appreciate that you just shipped something to the internet.
Now, set up one good habit: every time you push code to GitHub, Vercel automatically redeploys. You can make changes locally, commit them, push, and see your changes live within minutes. No manual steps, no visiting the dashboard. Push code, site updates. That is the workflow from here on out.
If something breaks after an update, Vercel keeps a history of every deployment. Go to the "Deployments" tab, find the last working version, click the three-dot menu, and select "Promote to Production." Your site reverts in seconds. This safety net makes it much less scary to push changes frequently.
Dig deeper
A few hand-picked sources if you want to go further.
What This Means For You
Deployment is not a wall. It is a door, and you just walked through it. The first time is the hardest. Every deployment after this gets easier because you understand what is actually happening.
- If you are a founder building an MVP: You can go from idea to live product in a single afternoon. Build with your AI tool in the morning, deploy after lunch, share the URL with potential users by evening. Do not wait for a technical cofounder. Deploy your prototype today, show it to ten people, and learn from their reactions.
- If you are a career changer building your portfolio: Every project you deploy is proof that you can ship. A GitHub repository says "I can write code." A live URL says "I can deliver a product." Add your deployed URLs to your LinkedIn and your resume. Hiring managers consistently rank deployed projects above code-only repositories.
- If you are a marketer who needs web projects live fast: You no longer need to submit a ticket to engineering or wait three sprints for a landing page. Build a campaign page with AI, deploy it in under an hour, point a subdomain at it, and have it live before your next standup.
Start with the tools and techniques that make vibe coding work.
Explore the guides