The terminal is a black rectangle with a blinking cursor, and it might be the most intimidating thing you encounter when you start building with AI. No buttons. No menus. No icons. Just a blank space waiting for you to type something, and absolutely no hints about what that something should be.
Here is the good news: you do not need to become a terminal expert. You need about ten commands. That is it. Ten commands cover roughly 95% of what you will do as a vibe coder, and every single one of them does something you already understand conceptually. You just need to learn the words.
The Walkie-Talkie to Your Computer
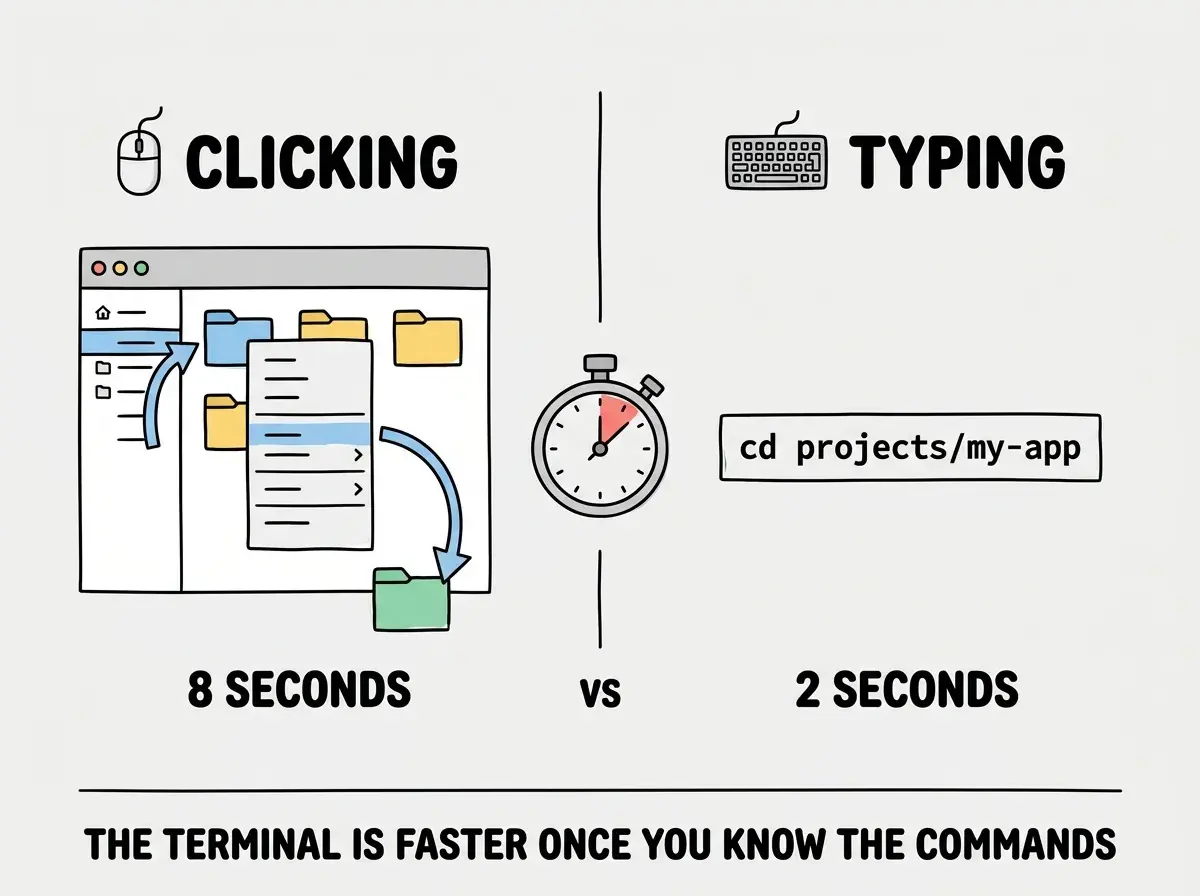
Think of the terminal as a walkie-talkie to your computer. Right now, you communicate with your computer by clicking things. You click a folder to open it. You click a file to see what is inside. You click buttons to install apps and run programs. The terminal does all of the same things, except you type text commands instead of clicking buttons.
Why would anyone type when they could click? Because AI coding tools live in the terminal. When Cursor, Claude Code, or any local development tool needs to run your app, install packages, or save your work, it uses terminal commands. Sometimes the tool runs these commands for you behind the scenes. Sometimes it tells you to run them yourself. Either way, understanding what those commands do removes the mystery and puts you in control.
The terminal is not a programming tool. It is a communication tool. You are just talking to your computer with text instead of clicks. Every command you learn is something you already know how to do with a mouse. The terminal just gives you a faster, more precise way to say it.
The 10 Commands You Actually Need
Let's walk through every command you will use, in the order you are most likely to need them.
1. pwd (Print Working Directory)
What it does: Tells you where you are right now.
When you open the terminal, you are "inside" a folder on your computer, just like when you open Finder or File Explorer. But the terminal does not show you a visual path at the top of the window. You have to ask. Typing pwd is like looking up at a street sign to figure out where you are.
2. ls (List)
What it does: Shows you what is in the current folder.
Think of it as opening a folder and looking at the contents. Type ls and you see a list of files and folders. No clicking required.
You will use this constantly. Before running your app, before installing anything, you will type ls to confirm you can see the right files. If you see your project's folders (like src, package.json, node_modules), you know you are in the right place.
3. cd (Change Directory)
What it does: Moves you into a different folder.
This is the equivalent of double-clicking a folder in Finder. Type cd my-project and you move into that folder. Type cd .. (with two dots) and you move back up one level, like clicking the back arrow.
You will use this at the start of almost every session. AI tools often create a new project folder, and you need to cd into it before you can do anything.
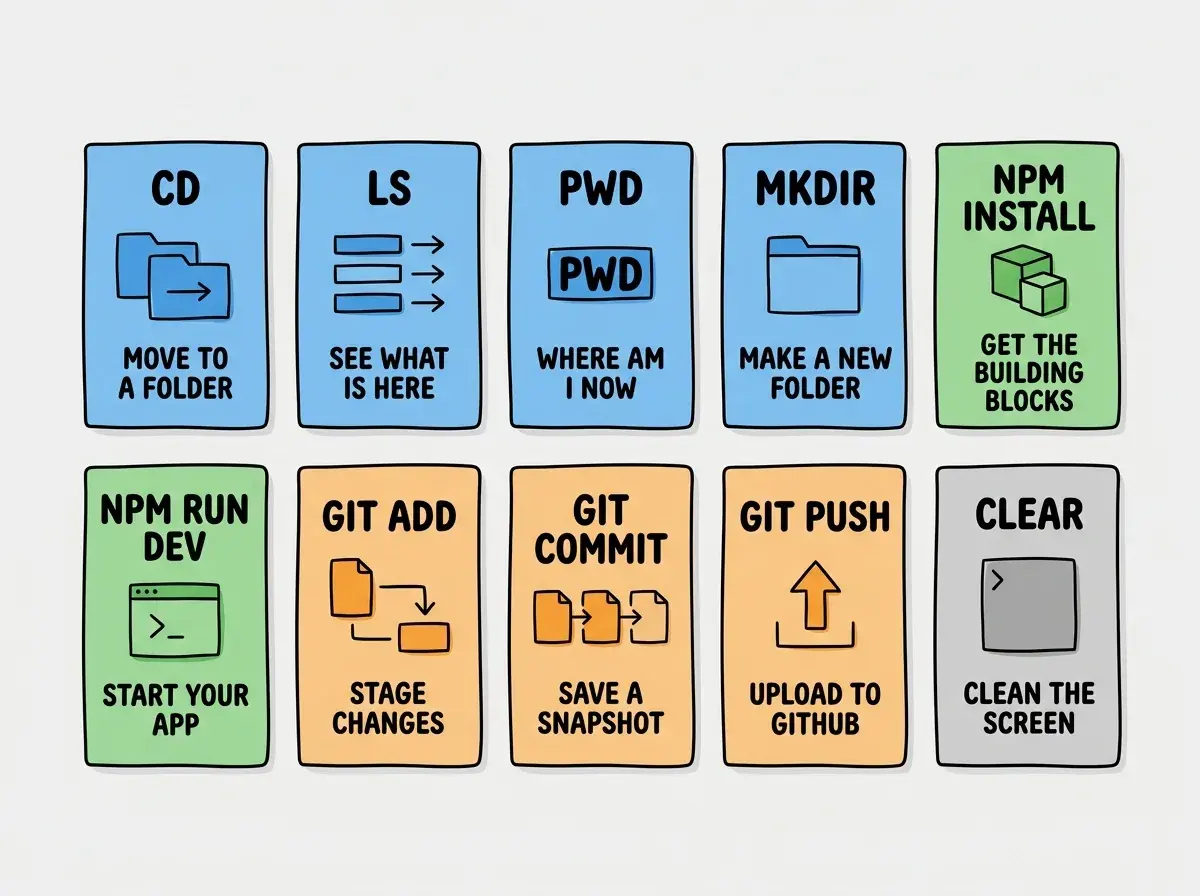
4. mkdir (Make Directory)
What it does: Creates a new folder.
Type mkdir my-new-project and a folder called "my-new-project" appears. No right-clicking, no "New Folder" menu option. Just one word and a name.
You will use this less often because AI tools usually create folders for you. But when a tutorial says "create a new directory," now you know the command.
5. npm install
What it does: Downloads all the code packages your project needs.
This is the big one. Your project has a shopping list of tools it depends on (stored in a file called package.json). Running npm install reads that list and downloads everything. Think of it as stocking your kitchen with all the ingredients a recipe requires.
You will run this every time you start working on a project for the first time. If you see an error that says "module not found," running npm install is almost always the first thing to try.
6. npm run dev
What it does: Starts your app on your computer so you can see it in your browser.
After installing everything, this command fires up a local version of your app. Your terminal will show some output and give you a URL (usually http://localhost:3000). Open that URL in your browser and there is your app, running live on your machine.
You will run this every single session. It is how you see what you are building. The app runs as long as the terminal is open. When you want to stop it, press Ctrl + C (or Cmd + C on Mac).
7. git add .
What it does: Tells git "I want to save these changes."
Git is version control, the system that tracks every change you make to your project like an infinite undo button. But git does not automatically save everything. You have to tell it which changes to include in your next save. git add . (with the dot) means "include everything I have changed."
Think of it as putting items on the checkout counter before paying. You are staging your changes, saying "yes, I want to keep all of this."
8. git commit -m "your message"
What it does: Saves a snapshot of your project with a description.
After staging your changes with git add ., this command takes the actual snapshot. The -m flag lets you attach a message describing what changed, like git commit -m "added signup page".
The message is for future you (or your team), so write something descriptive. "Fixed stuff" is less helpful than "fixed login button not working on mobile."
Understanding the terminal makes every AI coding tool easier to use.
Start here9. git push
What it does: Uploads your saved snapshots to the cloud.
git commit saves your work locally, on your computer. git push sends those saves to GitHub (or whatever hosting service you use). This is how your code gets backed up, shared with teammates, and deployed to the internet.
The rhythm becomes second nature: make changes, git add ., git commit -m "message", git push. That four-step sequence is how professional developers have saved their work for decades.
10. clear
What it does: Cleans up your terminal screen.
After running a bunch of commands, your terminal fills up with output and logs. clear wipes the screen clean so you can think straight. It does not undo anything or delete anything. It just tidies up the view, like clearing papers off your desk.
The Rhythm of a Real Session
Here is what a typical vibe coding session looks like with these ten commands.
You open the terminal. You type cd my-project to navigate to your project folder. You type ls to confirm you see the right files. You run npm install if it is your first time (or if something seems missing). You type npm run dev to start the app. You open your browser and visit localhost:3000 to see it running.
Now you work. You use your AI tool to make changes, add features, fix things. When you are happy with a batch of changes, you open a new terminal tab (the first one is still running your app). You type git add ., then git commit -m "added contact form", then git push.
That is the whole workflow. Navigate, install, run, build, save, push. The commands are the same whether you are building a personal blog, a SaaS product, or a client prototype.
What to Do When Something Goes Wrong
Two things will happen regularly, and neither one means you broke anything.
First, you will type a command and get "command not found." This means the tool is not installed. If npm is not found, you need to install Node.js. If git is not found, you need to install Git. A quick search for "install Node.js" or "install Git" for your operating system will have you running in five minutes.
Second, you will be in the wrong folder. You will run npm run dev and see "no package.json found." This means you are not inside your project folder. Type pwd to see where you are, then cd to the right place. This happens to everyone, including professional developers.
Running commands in the wrong folder is the most frequent beginner error, and it is also the easiest to fix. If any command fails with a "not found" message related to your project files, type pwd and ls to check your location. Nine times out of ten, you just need to cd into the right folder.
Dig deeper
A few hand-picked sources if you want to go further.
What This Means For You
The terminal is not a barrier between you and building things. It is a bridge. These ten commands are the vocabulary for that bridge, and now you speak the language.
- If you are a founder: Every AI coding tool you evaluate will involve the terminal at some point. Knowing these ten commands means you can follow any tutorial, run any demo, and evaluate tools yourself instead of waiting for someone technical to do it for you. That independence saves you time and money in the earliest, most critical stages of building a product.
- If you are a marketer building tools: You want to spin up landing pages, internal dashboards, and campaign tools with AI. The terminal is how you run them locally, test them, and push them live. These ten commands turn "I need an engineer for that" into "I will have it done by lunch."
- If you are a creative building something new: Designers, writers, and artists are increasingly building their own tools and portfolios with AI. The terminal is the last piece of the puzzle between having an idea and seeing it live on the internet. You already understand the creative process. Now you have the mechanical vocabulary to match.
You do not need to memorize all ten commands right now. Bookmark this page, open your terminal, and try pwd, ls, and cd with a few folders. That first five minutes of typing commands and seeing your computer respond is the moment it stops being scary and starts being useful.
Now that you speak terminal, put those commands to work on a real project.
Get started