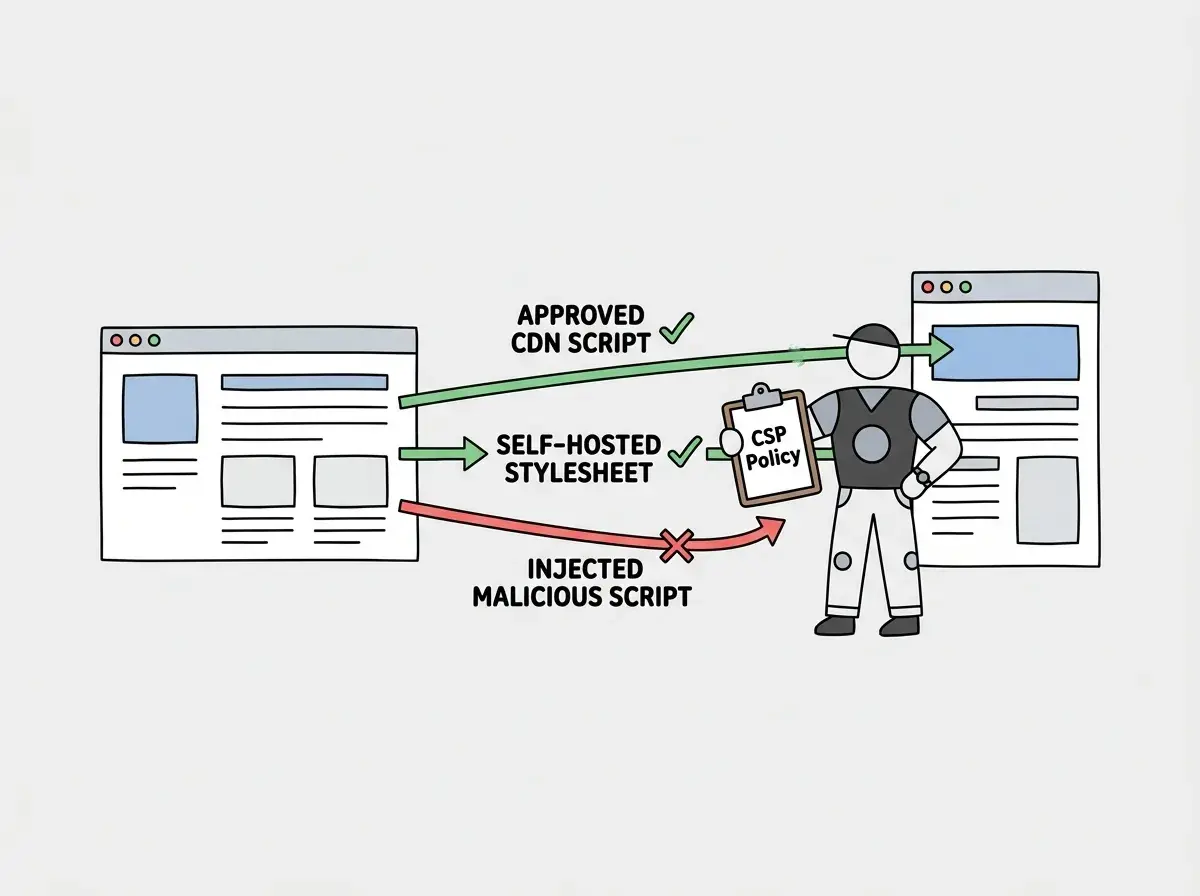
Think of Content Security Policy as a bouncer standing at the door of your web application. This bouncer has a guest list. Every script, stylesheet, image, and font that wants to load on your page has to show up on that list or it gets turned away. No list, no entry. No exceptions.
Without a CSP, your browser is running an open-door policy. Any script that gets injected into your page, whether through a cross-site scripting vulnerability or a compromised third-party dependency, executes with full privileges. It can read cookies, steal tokens, redirect users to phishing pages, and exfiltrate data. Ninety-two percent of developers use AI tools daily to write code, and AI-generated code is particularly susceptible to XSS because the models often skip output encoding or trust user input by default. A well-configured Content Security Policy configuration is the safety net that catches what your code misses.
This guide walks you through CSP from the ground up. What the directives mean, how to implement them in Next.js, and how to test everything without breaking your app in production.
What Content Security Policy Actually Does
CSP is an HTTP response header that tells the browser exactly which resources are allowed to load on a page. When the browser receives a page with a CSP header, it enforces those rules before executing or rendering anything. If a script tries to load from a domain not on the list, the browser blocks it. If an inline script tries to execute without a matching nonce, blocked. If an image tries to load from an unapproved origin, blocked.
The bouncer analogy runs deep here. Your CSP header is literally the guest list. Each directive on that list covers a different type of resource. script-src controls which scripts can run. style-src controls which stylesheets can load. img-src controls images. connect-src controls fetch requests and WebSocket connections. The bouncer checks each resource against the appropriate section of the list and makes a binary decision: allow or deny.
This is fundamentally different from sanitizing user input in your application code. Sanitization is important, but it is a game of whack-a-mole where you have to catch every single injection point. CSP flips the model. Even if malicious code slips through your input validation and ends up in the DOM, the browser refuses to execute it because it does not match the policy.
The Directives You Actually Need
CSP has over a dozen directives, but you do not need all of them for most applications. Here are the ones that matter for a typical AI-built web app.
default-src is your fallback. Any resource type that does not have its own directive falls back to this one. Set it to 'self' so that by default, only resources from your own origin are allowed.
script-src is the most critical directive. This controls which JavaScript can execute. For a Next.js app, you need 'self' for your own bundles and a nonce for inline scripts. Never use 'unsafe-inline' here. That defeats the entire purpose of CSP for XSS protection.
style-src controls stylesheets. If you use Tailwind CSS, your styles are typically bundled into CSS files served from your own origin, so 'self' works. If you use any CSS-in-JS libraries that inject inline styles, you will need 'unsafe-inline' here, which is less ideal but acceptable since inline styles are rarely an XSS vector.
img-src controls image sources. You will need your own origin plus any CDN or external image service you use. If you host images on Cloudflare R2 or an S3 bucket, add that domain.
connect-src controls where your app can make fetch requests, XHR calls, and WebSocket connections. This is where you whitelist your API endpoints, analytics services, and any third-party APIs your app calls.
font-src controls font loading. If you self-host fonts or use Google Fonts, add the appropriate origins.
frame-src controls which origins can be loaded in iframes. If you embed YouTube videos, Stripe checkout, or OAuth popups, you need those domains here.
Here is a solid starting policy for a Next.js application:
default-src 'self';
script-src 'self' 'nonce-{RANDOM}';
style-src 'self' 'unsafe-inline';
img-src 'self' https://images.yourdomain.com data:;
connect-src 'self' https://api.yourdomain.com;
font-src 'self';
frame-src 'none';
base-uri 'self';
form-action 'self';
The base-uri and form-action directives are often overlooked but they prevent attackers from hijacking your base URL or form submissions. Include them.
Start with a strict policy that only allows 'self' for everything, then add specific origins as your app requires them. It is far easier to loosen a strict policy than to tighten a permissive one. Every domain you add to your CSP is an expansion of your attack surface, so each addition should be intentional and documented.
Implementing CSP in Next.js With Nonces
The cleanest way to add CSP headers in Next.js is through middleware. This lets you generate a fresh nonce on every request and attach it to both the CSP header and your inline scripts.
Create or update your middleware.ts file at the project root:
import { NextResponse } from 'next/server'
import type { NextRequest } from 'next/server'

export function middleware(request: NextRequest) {
  const nonce = Buffer.from(crypto.randomUUID()).toString('base64')

  const cspHeader = `
    default-src 'self';
    script-src 'self' 'nonce-${nonce}' 'strict-dynamic';
    style-src 'self' 'unsafe-inline';
    img-src 'self' blob: data: https://images.yourdomain.com;
    connect-src 'self' https://api.yourdomain.com;
    font-src 'self';
    frame-src 'none';
    base-uri 'self';
    form-action 'self';
    upgrade-insecure-requests;
  `.replace(/\s{2,}/g, ' ').trim()

  const response = NextResponse.next()
  response.headers.set('Content-Security-Policy', cspHeader)
  response.headers.set('x-nonce', nonce)

  return response
}

export const config = {
  matcher: [
    '/((?!_next/static|_next/image|favicon.ico).*)',
  ],
}
The 'strict-dynamic' keyword is a powerful addition. When combined with a nonce, it tells the browser that any script loaded by an already-trusted script is also trusted. This means your Next.js runtime can dynamically load code-split chunks without you needing to list every possible chunk URL in your CSP.
To use the nonce in your layout, read it from the request headers:
import { headers } from 'next/headers'

export default async function RootLayout({
  children,
}: {
  children: React.ReactNode
}) {
  const headersList = await headers()
  const nonce = headersList.get('x-nonce') ?? ''

  return (
    <html lang="en">
      <body>
        <script nonce={nonce} />
        {children}
      </body>
    </html>
  )
}
Every inline script in your application needs to include this nonce attribute. If you use Next.js <Script> components, pass the nonce prop to them as well.
Testing With Report-Only Mode
Here is where most developers make a critical mistake. They write a CSP policy, deploy it to production, and immediately break half their site because they forgot about that one analytics script or that embedded widget their marketing team added six months ago.
The bouncer analogy applies perfectly here. Before you give your bouncer a strict guest list and tell them to turn people away, you want a trial run. Put the bouncer at the door with the list, but instead of blocking anyone, have them write down who would have been blocked. That is exactly what Content-Security-Policy-Report-Only does.
Instead of setting the Content-Security-Policy header, set Content-Security-Policy-Report-Only with a report-uri or report-to directive:
const cspHeader = `
  default-src 'self';
  script-src 'self' 'nonce-${nonce}' 'strict-dynamic';
  style-src 'self' 'unsafe-inline';
  img-src 'self' blob: data: https://images.yourdomain.com;
  connect-src 'self' https://api.yourdomain.com;
  font-src 'self';
  frame-src 'none';
  report-uri /api/csp-report;
`.replace(/\s{2,}/g, ' ').trim()

response.headers.set(
  'Content-Security-Policy-Report-Only',
  cspHeader
)
Create a simple API route to collect the violation reports:
// app/api/csp-report/route.ts
import { NextRequest, NextResponse } from 'next/server'

export async function POST(request: NextRequest) {
  const report = await request.json()
  console.log('CSP Violation:', JSON.stringify(report, null, 2))
  return NextResponse.json({ status: 'ok' })
}
Deploy this to production and let it run for a week. Check your logs daily. You will find violations you did not expect. Maybe your error tracking service loads a script from a domain you forgot. Maybe your chat widget loads fonts from a third-party CDN. Each violation report tells you exactly what was blocked and why, so you can decide whether to add that source to your policy or investigate further.
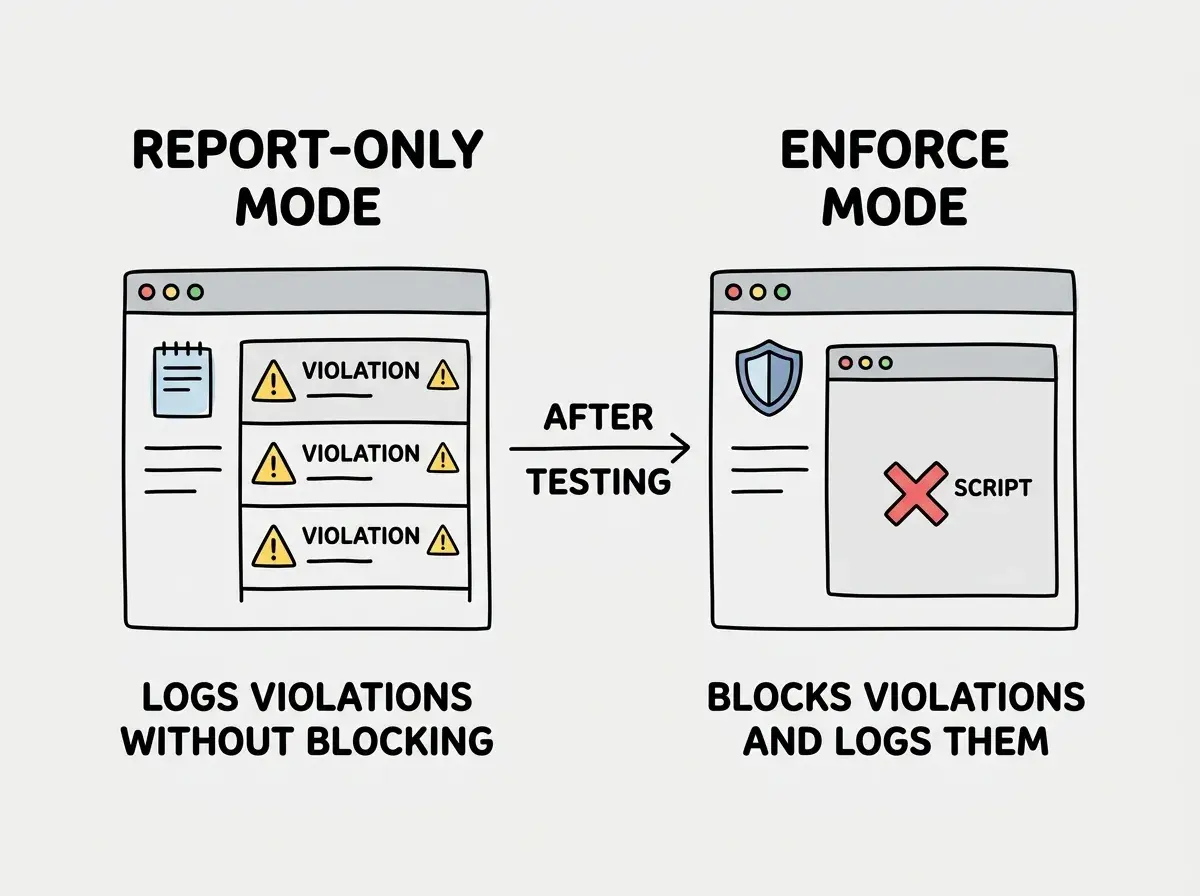
Once your violation reports are clean for several days, switch from Content-Security-Policy-Report-Only to Content-Security-Policy. Your bouncer now has the tested guest list and the authority to enforce it.
Using 'unsafe-inline' in your script-src directive because inline scripts keep breaking. This single keyword disables CSP's primary XSS protection. If you need inline scripts, use nonces instead. Generate a random nonce per request, add it to your CSP header as 'nonce-{value}', and set the nonce attribute on every inline script tag. It takes more work than 'unsafe-inline' but it preserves the entire security model.
Handling Common CSP Pitfalls in Production
Even after testing, you will encounter edge cases. Here are the ones that trip up experienced developers.
Third-party scripts that load other scripts. Analytics tools and chat widgets often load secondary scripts from unpredictable domains. The 'strict-dynamic' keyword helps because it trusts scripts loaded by already-trusted scripts. But if a third-party uses document.write or eval, those will still be blocked.
Inline event handlers. CSP blocks onclick, onload, and other inline event handlers regardless of your script-src setting. AI-generated code loves producing <button onclick="handleClick()"> patterns. Refactor these to use addEventListener instead.
Dynamic style injection. Some UI libraries inject styles at runtime using document.createElement('style'). Keeping 'unsafe-inline' in style-src is an acceptable trade-off since style injection is rarely an XSS vector compared to script injection.
WebSocket connections. If your app uses real-time features, WebSocket URLs (wss://) need to be listed in connect-src. Easy to miss if your dev environment uses polling instead.
Keep your CSP versioned in middleware and treat changes like any other security-sensitive code. Review them in pull requests.
Monitoring CSP After Deployment
CSP is not a set-and-forget configuration. Keep the report-uri directive active even after switching to enforcement mode so you get alerted when new violations occur. For production, send violation reports to a dedicated service like Sentry or Report URI rather than your own API route. They aggregate violations, filter browser extension noise, and alert you when legitimate resources get blocked.
Review your CSP quarterly. Remove origins you no longer use. Tighten directives where possible. Every unused origin in your policy is a dormant risk.
Your Content Security Policy configuration is one of the highest-leverage security investments you can make. A few lines of header configuration protect your users against an entire class of attacks. Start in report-only mode, iterate on violations, switch to enforcement, and keep monitoring. The bouncer never takes a day off, and neither should your policy.