You can build a professional landing page in fifteen minutes with AI coding tools. Not a wireframe. Not a mockup. A real, deployed page with a hero section, a features grid, a call-to-action, and a live URL you can send to customers tonight. This tutorial walks you through every step, including the exact prompts to use at each stage.
Think of this like assembling IKEA furniture. The AI gives you all the pieces, pre-cut and ready to go. Your job is to tell it which pieces you need, arrange them in the right order, and tighten the bolts. You do not need to know how to cut wood. You just need to know what the finished product should look like.
Why a Landing Page Is the Perfect First Build
Landing pages are the single most valuable thing a founder or marketer can build with AI coding tools. They are one page, one purpose, zero complexity. No databases, no user accounts, no payment processing. Just a clear message and a button that does something. If you have ever waited three weeks for engineering to build a campaign page, this tutorial is going to change your workflow permanently.
A freelance developer charges $500 to $2,000 for a basic landing page. A design agency charges more. Both take days or weeks. With AI coding, you can produce the same result in fifteen minutes for zero dollars. Not because the AI is magic, but because a landing page is a solved design problem. Hero, value propositions, social proof, CTA. The AI has seen thousands of them and knows the patterns cold.
Landing pages follow predictable patterns that AI excels at generating. A hero section, three to four feature cards, a testimonial block, and a call-to-action represent roughly 90% of all landing pages on the internet. The AI is not guessing; it is assembling proven components, and your job is to fill them with your specific message and voice.
This tutorial uses Cursor and Vercel, but the approach works with any AI coding tool (Claude Code, Windsurf, Bolt, Lovable). The prompts translate directly. If you are using a browser-based tool like Lovable or Bolt, skip the scaffolding step since those tools create the project for you.
Step 1, Scaffold Your Project
Open your terminal and run this command:
npx create-next-app@latest my-landing-page --tailwind --app --ts --eslint --src-dir --no-import-alias
This creates a Next.js project with Tailwind CSS already configured. You do not need to understand either one deeply right now. What matters is that this single command gives you a working project in about thirty seconds.
Open the project in Cursor. You will see a folder called src/app with a file called page.tsx. That is your landing page. Everything you build in the next twelve minutes goes in that one file.
Delete everything inside page.tsx and replace it with a minimal starting point:
export default function Home() {
  return (
    <main>
      <h1>Landing page goes here</h1>
    </main>
  );
}
Run npm run dev in your terminal. Open localhost:3000 in your browser. You should see "Landing page goes here" in plain text. That is your blank canvas.
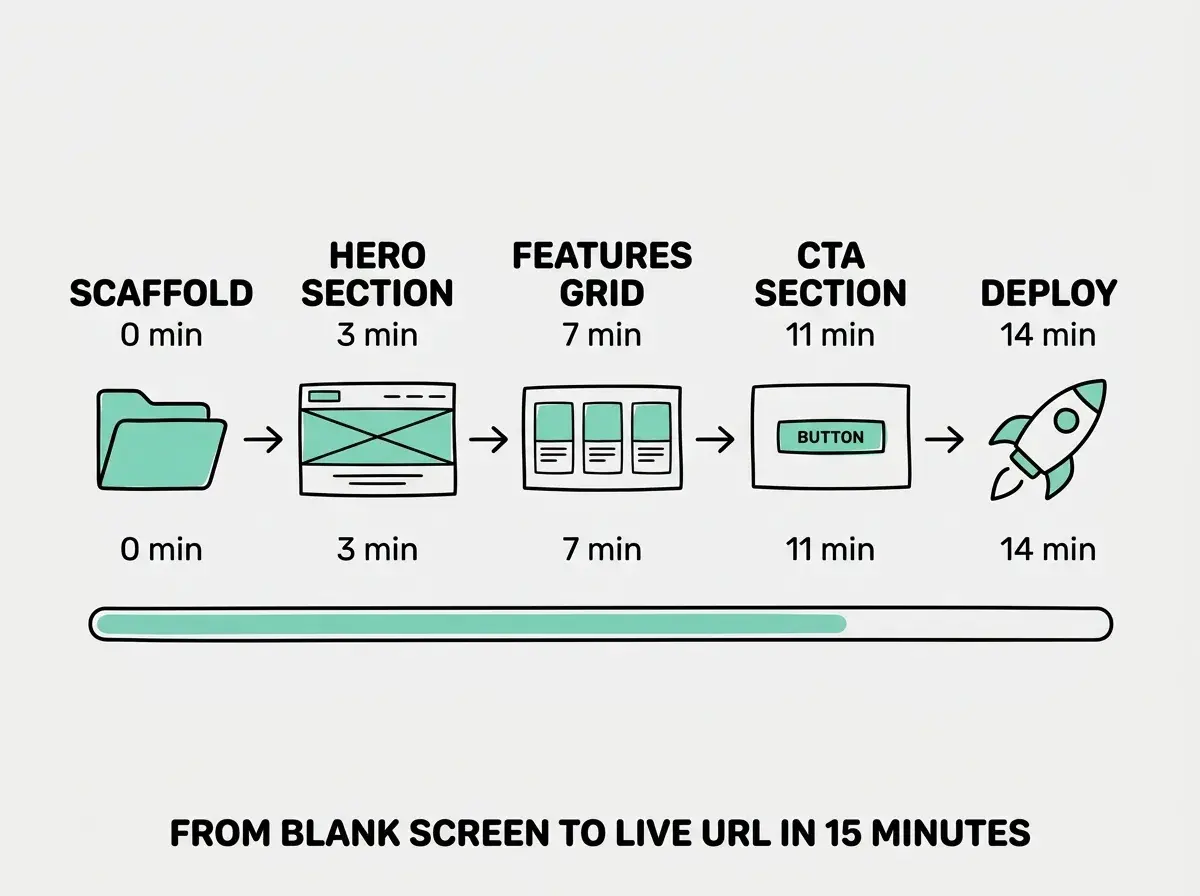
Checkpoint: You should have a running Next.js project with a blank page visible in your browser. Total time so far, about two minutes.
Step 2, Prompt the AI for Your Hero Section
This is where the AI does the heavy lifting. In Cursor, open page.tsx and use the inline editing shortcut (Cmd+K on Mac, Ctrl+K on Windows). Type this prompt:
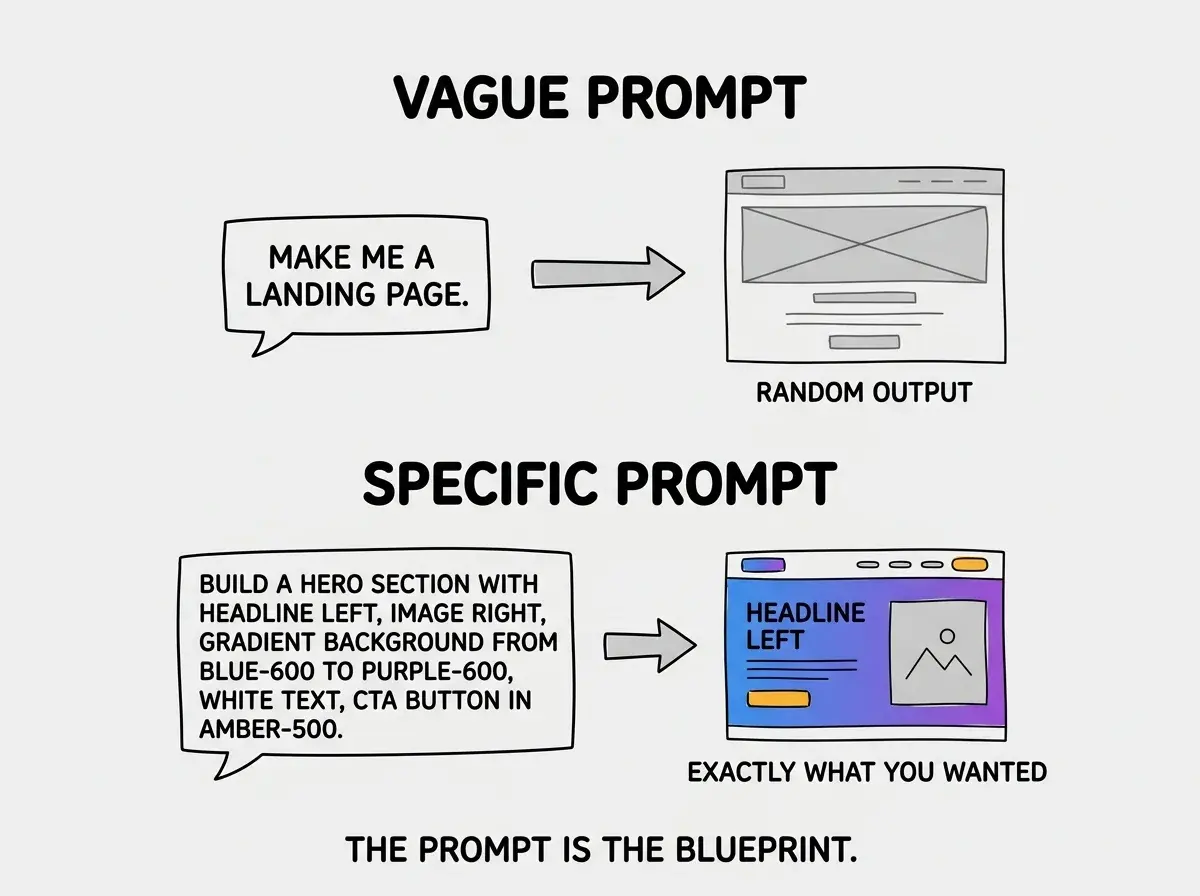
"Replace this with a hero section for a SaaS product called Beacon. Beacon is a project management tool for remote teams. The hero should have a large bold headline, a subtitle that explains the core value proposition in one sentence, a primary CTA button that says 'Start Free Trial' and a secondary text link that says 'See how it works'. Use Tailwind CSS for styling. Make the section full viewport height with the content vertically centered. White background, dark text, and use blue-600 as the accent color for the button."
Hit enter. Within ten seconds, the AI generates a complete hero section. Check your browser preview. You should see a professional-looking hero with proper typography, spacing, and a styled button.
If you do not love the result, follow up with specific changes: "Make the headline larger. Add more padding below the subtitle. Round the button corners." Keep each follow-up focused on one or two changes. The AI handles small, specific requests much better than vague ones like "make it look more professional."
Step 3, Build the Features Grid
Your hero section is done. Now you need to explain what the product actually does. Still in page.tsx, place your cursor below the hero section and prompt:
"Add a features section below the hero. Include a section heading that says 'Everything your remote team needs' and a grid of four feature cards. The features are: (1) Task Boards with drag-and-drop kanban boards, (2) Time Zones with see your whole team's local time at a glance, (3) Async Updates with daily standups without the meeting, (4) File Sharing with centralized documents everyone can find. Each card should have a small emoji icon at the top, a bold title, and a one-sentence description. Use a 2x2 grid on desktop that stacks to a single column on mobile. Keep the same color scheme as the hero."
The AI generates a complete features grid with responsive layout. Check both desktop and mobile views (resize your browser window to test mobile).
Find the right tool for your first project.
Compare the optionsHere is a prompt pattern that works for almost any section: tell the AI what the section is (features grid, testimonial block, pricing table), what content to include (specific titles, descriptions, names), and what design constraints to follow (colors, layout, responsive behavior). The more specific you are about content, the less editing you do afterward.
Step 4, Add the Call-to-Action Section
Every landing page needs a strong close. Below your features section, prompt:
"Add a CTA section with a blue-600 background and white text. Large heading that says 'Start building with your team today'. A subtitle that says 'Free for teams up to 10 people. No credit card required.' A white button with blue text that says 'Get Started Free'. Add generous padding above and below."
This takes ten seconds to generate. You now have three complete sections: hero, features, and CTA. That is a fully functional landing page.
If you have extra time, add a social proof section between features and CTA: "Add a section with the heading 'Trusted by 2,000+ remote teams' and a row of five grayscale company logo placeholders. Below the logos, add a testimonial quote from 'Sarah Chen, Engineering Lead at Ramp' that says 'Beacon replaced three tools for us.'"
Checkpoint: You should have a complete landing page with at least three sections visible in your browser. The design should be clean, responsive, and ready for real content. Total time, about ten minutes.
Step 5, Deploy to Vercel in Under Five Minutes
Your landing page looks great locally. Now make it real. Open your terminal:
git init
git add .
git commit -m "Initial landing page"
Create a new repository on github.com called my-landing-page and push your code:
git remote add origin https://github.com/YOUR-USERNAME/my-landing-page.git
git branch -M main
git push -u origin main
Now go to vercel.com. Sign up with your GitHub account (or log in if you already have one). Click "Add New Project," find your repository, and click "Import." Vercel auto-detects Next.js and fills in the build settings. Click "Deploy."
Within ninety seconds, Vercel gives you a live URL like my-landing-page.vercel.app. Open it. Open it on your phone. That is your landing page, live on the internet, with HTTPS and global edge distribution. For free.
Trying to make the landing page perfect before deploying. Deploy at ten minutes, not thirty. Every change you make after this point automatically redeploys when you push to GitHub. The fastest feedback loop is: see something you want to change, prompt the AI, commit, push, and the live site updates within a minute. Perfectionism before deployment is how landing pages end up living on localhost forever. Deploy the version you have right now, then improve the live version.
From this point forward, every push to GitHub triggers an automatic redeploy. Change the headline, swap the accent color, add a pricing section. Push to GitHub and the live site updates within a minute.
Prompts That Work for Any Landing Page
The prompts above used a fake SaaS product, but the pattern works for anything. Here are adapted versions.
Freelancer portfolio: "Build a hero section for a freelance brand designer named Maya Torres. Include a large name, the title 'Brand Designer', a one-line description of her work, and a CTA button that says 'View My Work'. Minimal style, lots of whitespace, serif font for the name."
Product launch: "Build a hero section for a new mobile app called Drift that helps people find walking routes. Include the app name, a tagline, a mockup of a phone screen (use a placeholder rectangle), and download buttons for iOS and Android."
The pattern is the same every time: who the page is for, what text to display, what action you want the visitor to take, and basic design direction. Swap in your details and the AI handles the rest.
Dig deeper
A few hand-picked sources if you want to go further.
What This Means For You
You just went from a blank terminal to a live landing page in fifteen minutes. That is not a demo. That is a workflow you can repeat every time you need a new page.
- If you are a founder validating an idea: You can now build a landing page for a new product concept in the time it takes to eat lunch. Write the prompts, deploy the page, drop the link into a Reddit thread, and see if anyone clicks the CTA. Before today, testing a landing page meant hiring a designer or spending a weekend with a page builder. Now it takes fifteen minutes. Build the page for your next idea this afternoon and test it with real people by tonight.
- If you are a marketer running campaigns: You no longer need to wait for a developer to build campaign-specific pages. New product launch? Fifteen minutes. A/B test variant with a different headline and hero layout? Another fifteen minutes. Each page lives at its own URL, deploys instantly, and costs nothing to host. Build your next campaign page before your standup tomorrow.
Follow the full zero-to-shipped series and go from landing page to complete app.
Continue the series