92% of US developers now use AI coding tools daily. They are shipping apps faster than ever. But there is a gap between a working prototype and a production app that stays working at 2am when you are asleep. That gap is operations. AI handles boilerplate beautifully. It misses the infrastructure layer almost every time.
This is the minimal viable DevOps setup for solo builders. Not the enterprise playbook. Not a 47-step guide to Kubernetes. The $50-200/month stack that covers 95% of what your app actually needs.
What AI Gets Wrong About Production
Prompting an AI to build a feature works. Asking it to set up your full production environment is where things fall apart. Not because AI cannot write the code, but because it does not have context about your specific setup, your secrets management, or what happens when a cron job silently fails at 3am.
Here is what AI consistently misses when building apps:
- Environment variable handling (hardcoded values in dev, no
.env.example) - Secrets management (API keys committed to git, no rotation plan)
- CI/CD (works on my machine, no automated checks before deploy)
- Error monitoring (app crashes silently, you find out from a user email)
- Structured logging (console.log everywhere, impossible to query in prod)
- Database backups (zero, until the day you need one)
None of these are complicated. They are just not the exciting part of building, so AI skips them and so do you. Fixing all six takes one focused afternoon. The cost is low. The alternative is a production incident that takes days to debug.
The Four Layers You Actually Need
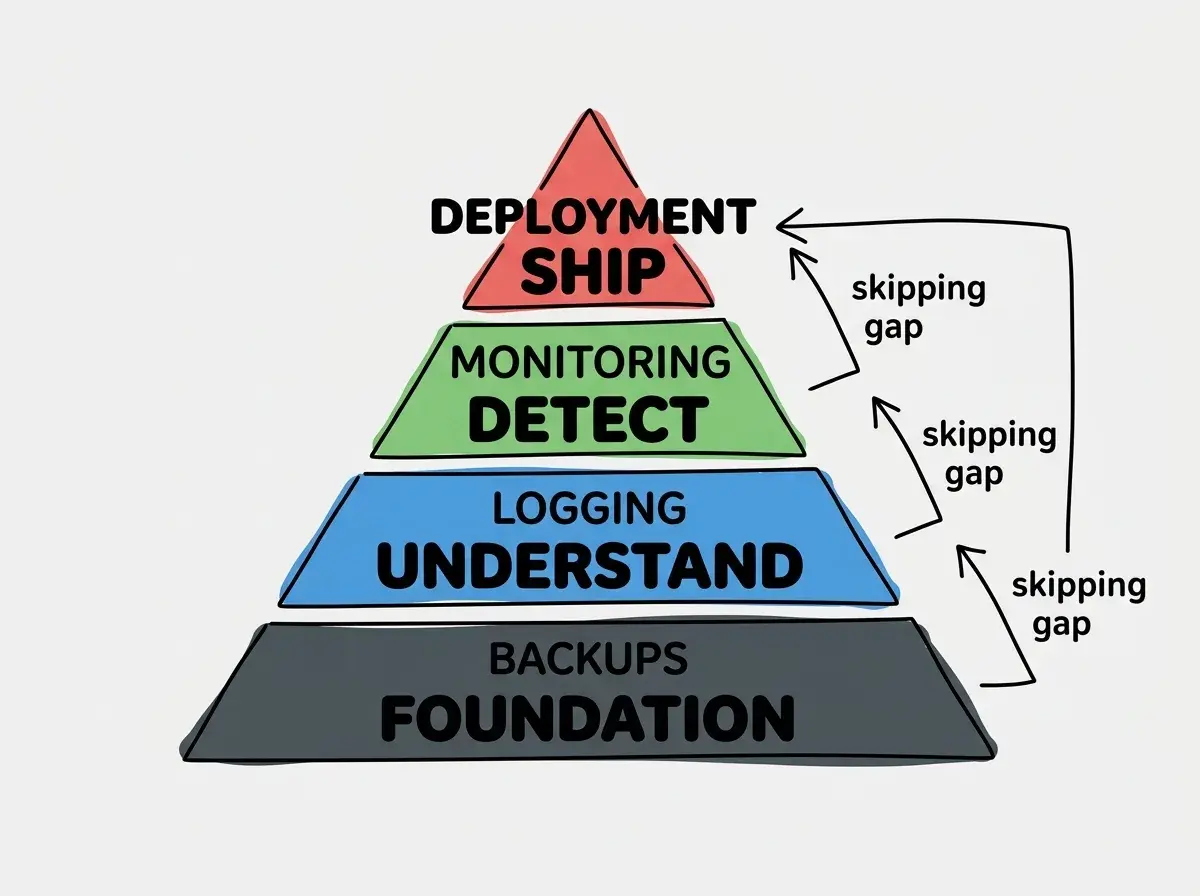
Think of your ops setup as four layers stacked on top of each other. Skip one and the whole thing is fragile. Get all four right and you can step away from your laptop without anxiety.
Layer 1: Deploy reliably. Push code, it builds, it ships. If the build fails, the old version stays live. No manual steps.
Layer 2: Know when things break. An error happens, you get a notification. Not from a user. From your monitoring.
Layer 3: Understand what happened. Something went wrong. You can look at logs and know exactly what, when, and why.
Layer 4: Recover from data loss. Something catastrophic happens to your database. You can restore to yesterday. You do not lose users.
Most solo builders nail Layer 1. They ignore Layers 2, 3, and 4 until they get burned. Setting them up now takes less time than recovering from the first incident without them.
Deployment That Does Not Require You
The baseline is push-to-deploy. Vercel, Netlify, and Cloudflare Pages all give you this for free. Code goes to GitHub, platform detects the push, builds run, site deploys. If the build fails, nothing goes live. That one check catches a lot.
But there are two things the platforms do not give you automatically.
Branch protection. In GitHub, go to Settings, Branches, and add a rule for your main branch. Enable "Require status checks to pass before merging." This means a failed build blocks a merge. It costs nothing and takes three minutes to set up.
A basic CI check before deploy. Create .github/workflows/ci.yml in your repo with a lint step and a build step. When you push, this runs before your hosting platform starts. It catches issues earlier, when feedback is faster.
The whole setup for Layer 1 costs $0. You are using what your hosting provider already gives you, plus a GitHub Actions workflow that takes half an hour to write once.
If you are beyond hobby projects, add a staging environment. Most platforms let you connect a non-main branch to a staging URL. Push to staging, verify it works, then merge to main. Two environments, zero extra infrastructure cost on Vercel or Cloudflare Pages free tiers.
The deploy layer is not about more tools. It is about using what your hosting platform already gives you. Branch protection plus a CI check on GitHub costs nothing and catches 80% of pre-production bugs. Add a staging branch and you have a real deployment workflow without paying for extra infrastructure.
Monitoring That Wakes You Up
The question is not whether your app will have errors. It will. The question is whether you find out before your users do.
Error monitoring tools sit in your app and capture every unhandled exception. They group similar errors together, show you stack traces, and send you an alert when something new breaks. The two tools worth looking at for solo builders are Sentry and BetterStack.
Sentry is the default choice. Free tier covers 5,000 errors per month. Setup is one npm install and three lines of code in your app entry point. It works with Next.js, React, Node, and most other stacks. When an error happens, you get a Slack message or email with the full stack trace, the user's browser, and a reproduction count.
npm install @sentry/nextjs
npx @sentry/wizard@latest -i nextjs
That two-line setup is genuinely most of what you need. The wizard creates the config files. Cost on the free plan: $0.
BetterStack (formerly Logtail) does uptime monitoring alongside log management. You add their endpoint to your app, point monitoring at your domain, and they ping it every minute. If your site goes down, you get a text message. The free tier covers two monitors and 1GB of logs per month. For a production SaaS under 1,000 users, that is enough.
For a typical solo SaaS at under 1,000 users, the monitoring budget looks like this:
- Sentry free tier: $0/month
- BetterStack free tier: $0/month (upgrade to $24/month if you need more uptime monitors)
- Total monitoring cost: $0 to $24/month
You know immediately when something breaks. You have the stack trace. You did not need a user to email you.
Logging You Can Actually Use
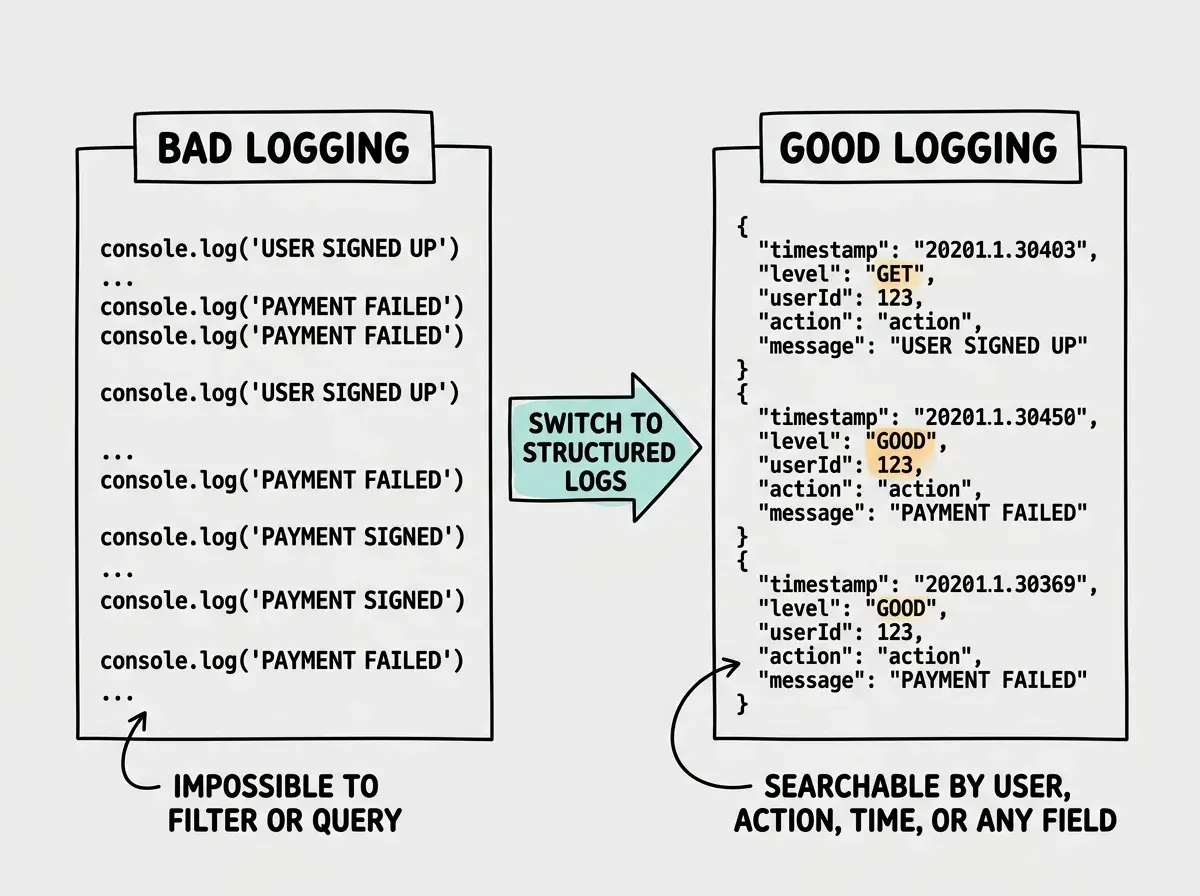
console.log is not a logging strategy. It works in development. In production on a serverless platform, those logs vanish the moment the function ends or scroll off the screen during a high-traffic period.
Structured logging means your log entries are JSON objects with consistent fields. When something goes wrong, you can filter by user ID, by endpoint, by error code. You can answer the question "what exactly happened to user@example.com at 3:42pm on Tuesday" in under two minutes.
The minimal setup is a lightweight logger that writes JSON. pino is the standard for Node/Next.js apps.
npm install pino pino-pretty
import pino from 'pino'

const logger = pino({
  level: process.env.LOG_LEVEL || 'info',
})

export default logger
Then in your API routes and server functions, replace console.log('user signed up') with logger.info({ userId, email }, 'user signed up'). Now every log entry has a timestamp, a level, and structured fields you can query.
Ship those logs to BetterStack or Axiom ($0 on the free tier for 500MB/month). Both have a search UI that lets you query across your log history. When you get an error alert from Sentry, you switch to your log tool and search for what happened around that timestamp. You have the full picture in two tabs.
Backups That Actually Exist
This is the one that hurts when you skip it. Databases do not come with automatic backups by default on most hosting platforms. You have to turn them on or set them up yourself.
The good news is that most managed database services make this easy.
Supabase provides daily backups on the Pro plan ($25/month). On the free tier, you have no backups. If you are storing real user data, you are on the Pro plan.
PlanetScale (MySQL-compatible) includes daily backups on all paid plans starting at $29/month.
Railway lets you enable daily database snapshots through their dashboard. Point and click, one minute.
Neon (serverless Postgres) keeps 7 days of point-in-time restore on paid plans.
The rule is simple: if you have users who would be upset to lose their data, you are paying for managed backups. That cost is already in your $50-200/month budget for a production app under 1,000 users.
Beyond the database, make sure your code is in git. That is your application backup. Your environment variables should be in a password manager or a secrets manager (Doppler costs $0 on the free tier for solo projects). If your server burns down, you can rebuild the whole thing from git plus your env var backup in under an hour.
Relying on your database provider's default settings for backups. Most free tiers do not include automatic backups, and the documentation buries this fact. Check your database dashboard right now. If you do not see a backups section with recent restore points, you have no backups. Fix this before you do anything else in this guide.
The Budget Breakdown
Here is what minimal viable DevOps actually costs for a solo SaaS serving under 1,000 users:
| Layer | Tool | Cost |
|---|---|---|
| Deployment | Vercel / Cloudflare Pages | $0-20/month |
| Error monitoring | Sentry free tier | $0/month |
| Uptime monitoring | BetterStack free tier | $0/month |
| Log management | Axiom free tier | $0/month |
| Database backups | Included with managed DB plan | $25-29/month |
| Secrets management | Doppler free tier | $0/month |
Total range: $25-49/month on the low end. That leaves budget room for your actual infrastructure, auth, and email tools within the $50-200/month envelope.
The expensive version of this stack (Sentry Team plan, BetterStack paid, Datadog for logs) runs $150-300/month and is what you reach for when you have paying customers who depend on 99.9% uptime. Start with the free tier stack. Upgrade the specific piece that starts failing you.
Get the deployment basics right before you add monitoring layers.
See the shipping checklistPutting It Together in One Afternoon
Here is the order of operations for setting up minimal viable DevOps on an existing app:
-
Enable branch protection on GitHub (10 minutes). Settings, Branches, add a rule for main, require status checks.
-
Add a CI workflow to
.github/workflows/ci.ymlwith lint and build steps (20 minutes). -
Install Sentry and configure it for your framework (30 minutes). Test that errors are flowing by throwing a deliberate test error and checking the Sentry dashboard.
-
Set up BetterStack uptime monitoring on your production URL (10 minutes). Connect your Slack or phone for alerts.
-
Switch to structured logging with pino or equivalent (1 hour). Ship logs to BetterStack or Axiom. Verify logs appear in the dashboard.
-
Verify database backups are enabled and test a restore (20 minutes). Actually do the restore. Knowing you have backups and knowing backups work are different things.
-
Store all env vars in Doppler or a password manager (30 minutes). Delete them from your local notes, your Notion, anywhere they should not be.
Total time: about 3 hours. After that afternoon, you have the four layers in place. Errors alert you. Logs tell you what happened. Backups let you recover. Deploys are automated and safe.
AI tools got you from zero to working app fast. This one afternoon gets you from working app to production-ready app. Most solo builders skip it. The ones who get burned wish they had not.
Dig deeper
A few hand-picked sources if you want to go further.
Join other indie hackers figuring out the production side of vibe coding.
Explore the blog